Baptism Camera Instructions
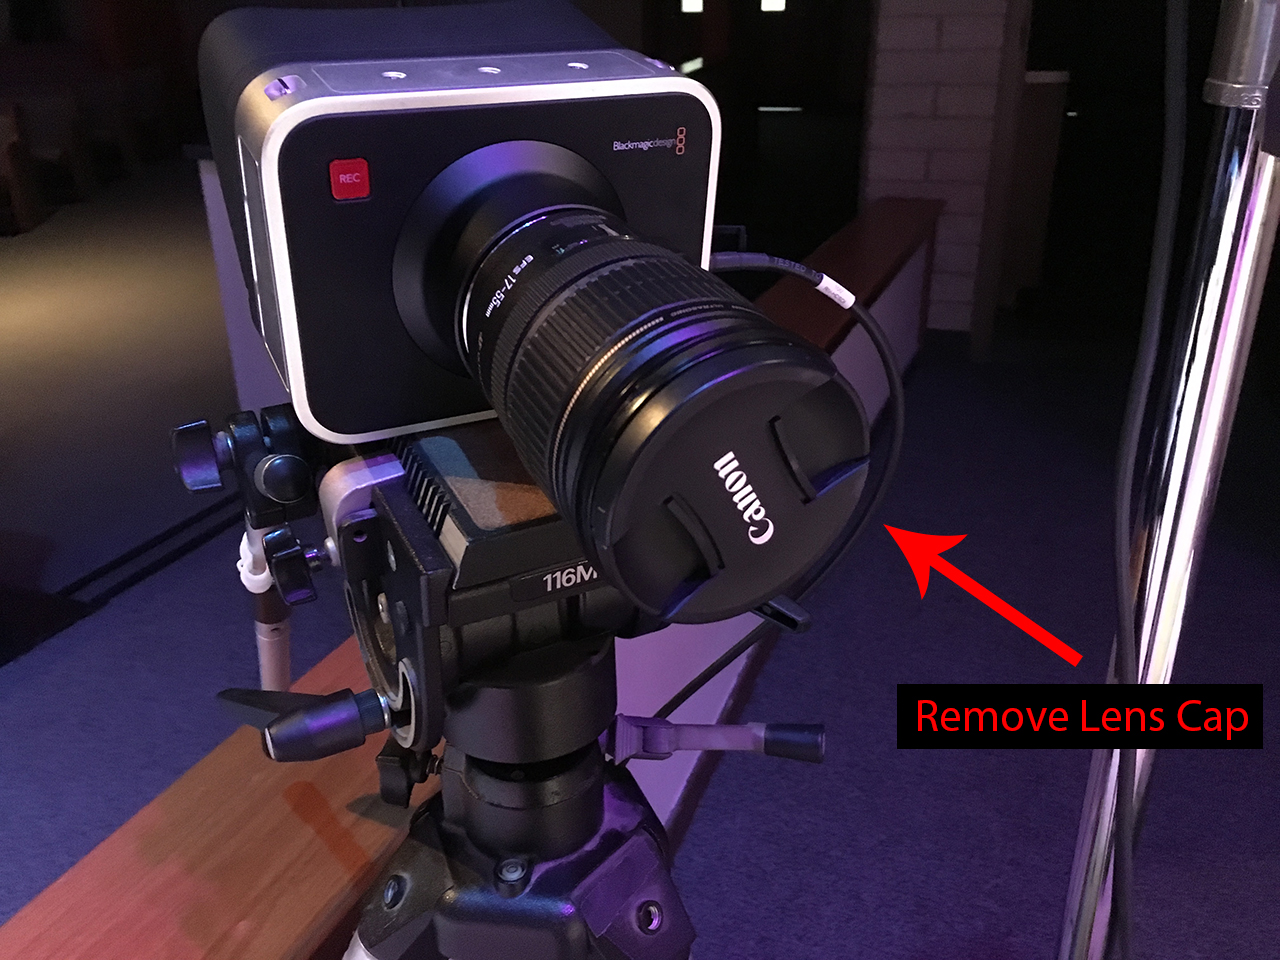
- Power on camera and remove Lens Cap.
- Test camera on screens before production meeting.
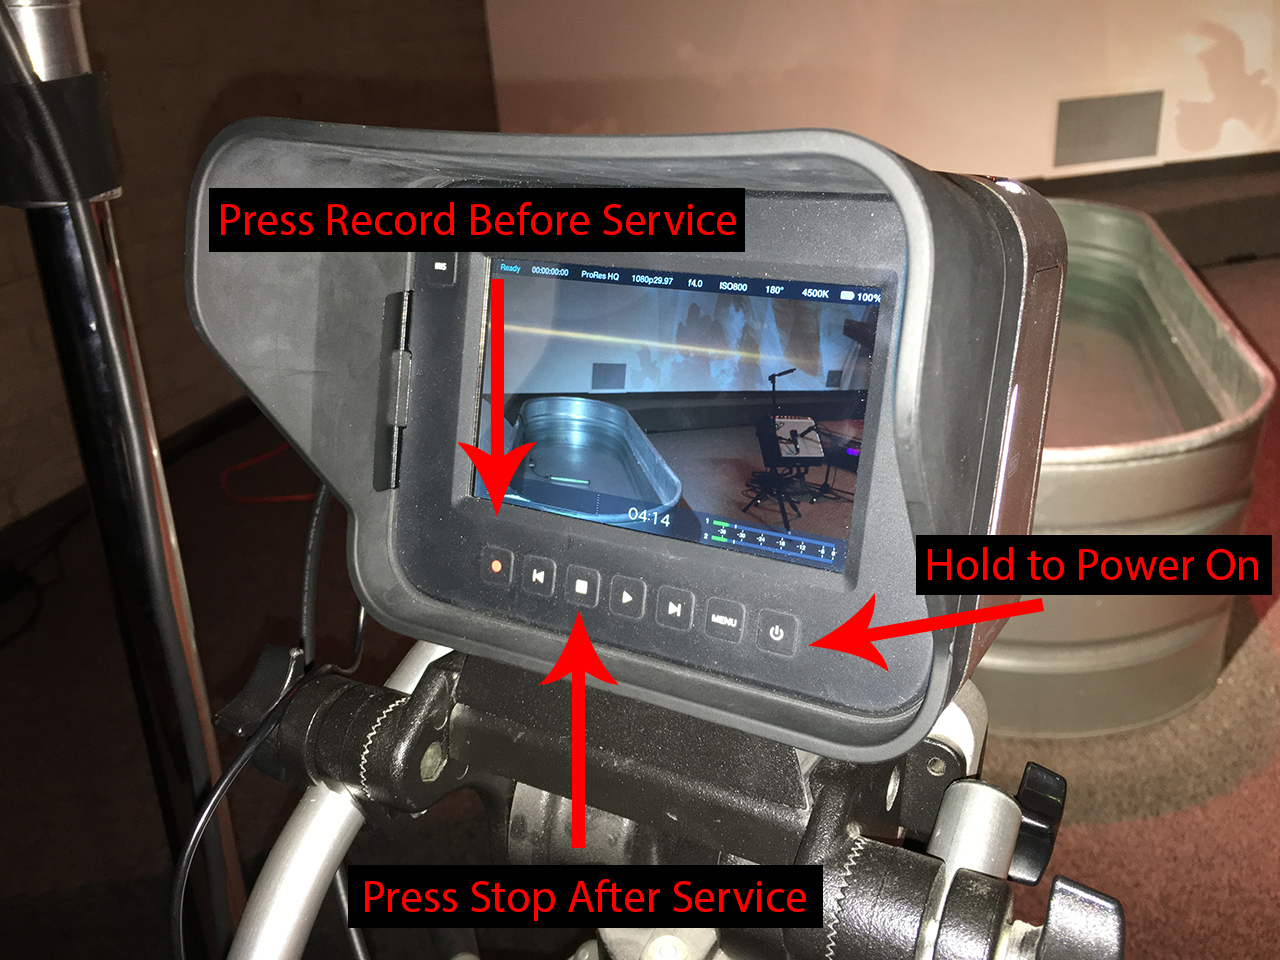
- 10 – 15 minutes before service starts, press record on the camera.
- Stop camera recording in-between services.
- Start recording again 10 – 15 minutes before next service.
- After all services for the day, power off camera and replace lens cap.
Instructions for Live Camera:
- Holt:
- Press the “Baptism Preset” button on the tripod mounted button controller. Camera should display live on the side screens.
- Press either the “Worship Preset” button to switch back to graphics, or the “Message Preset” button to switch to the IMAG camera.
- If the tripod mounted button controller is not working, use the Baptism Preset Macro in the ATEM software running on the PC behind the camera platform.
- REO Town:
- In ProPresenter, click on the first slide of the first song after the message to activate the Live camera feed.
- Clicking on the “Live” button in the top toolbar will disable the camera when baptisms are done.
- Clicking on the first slide in the “Close” playlist item will also disable the camera.
- Be sure to test camera on screens before the Production Meeting. If camera is not displaying, quit and restart ProPresenter application.
- In ProPresenter, click on the first slide of the “Baptism Camera Sync” playlist item (after the message).
- Clicking the “Live” button in the top toolbar will disable the camera when baptisms are done.
- You’ll need to click on a background after disabling the camera. Clicking the first slide in the “Close” playlist item will also disable the camera.