Before Service
- Insert SD card from black production bin
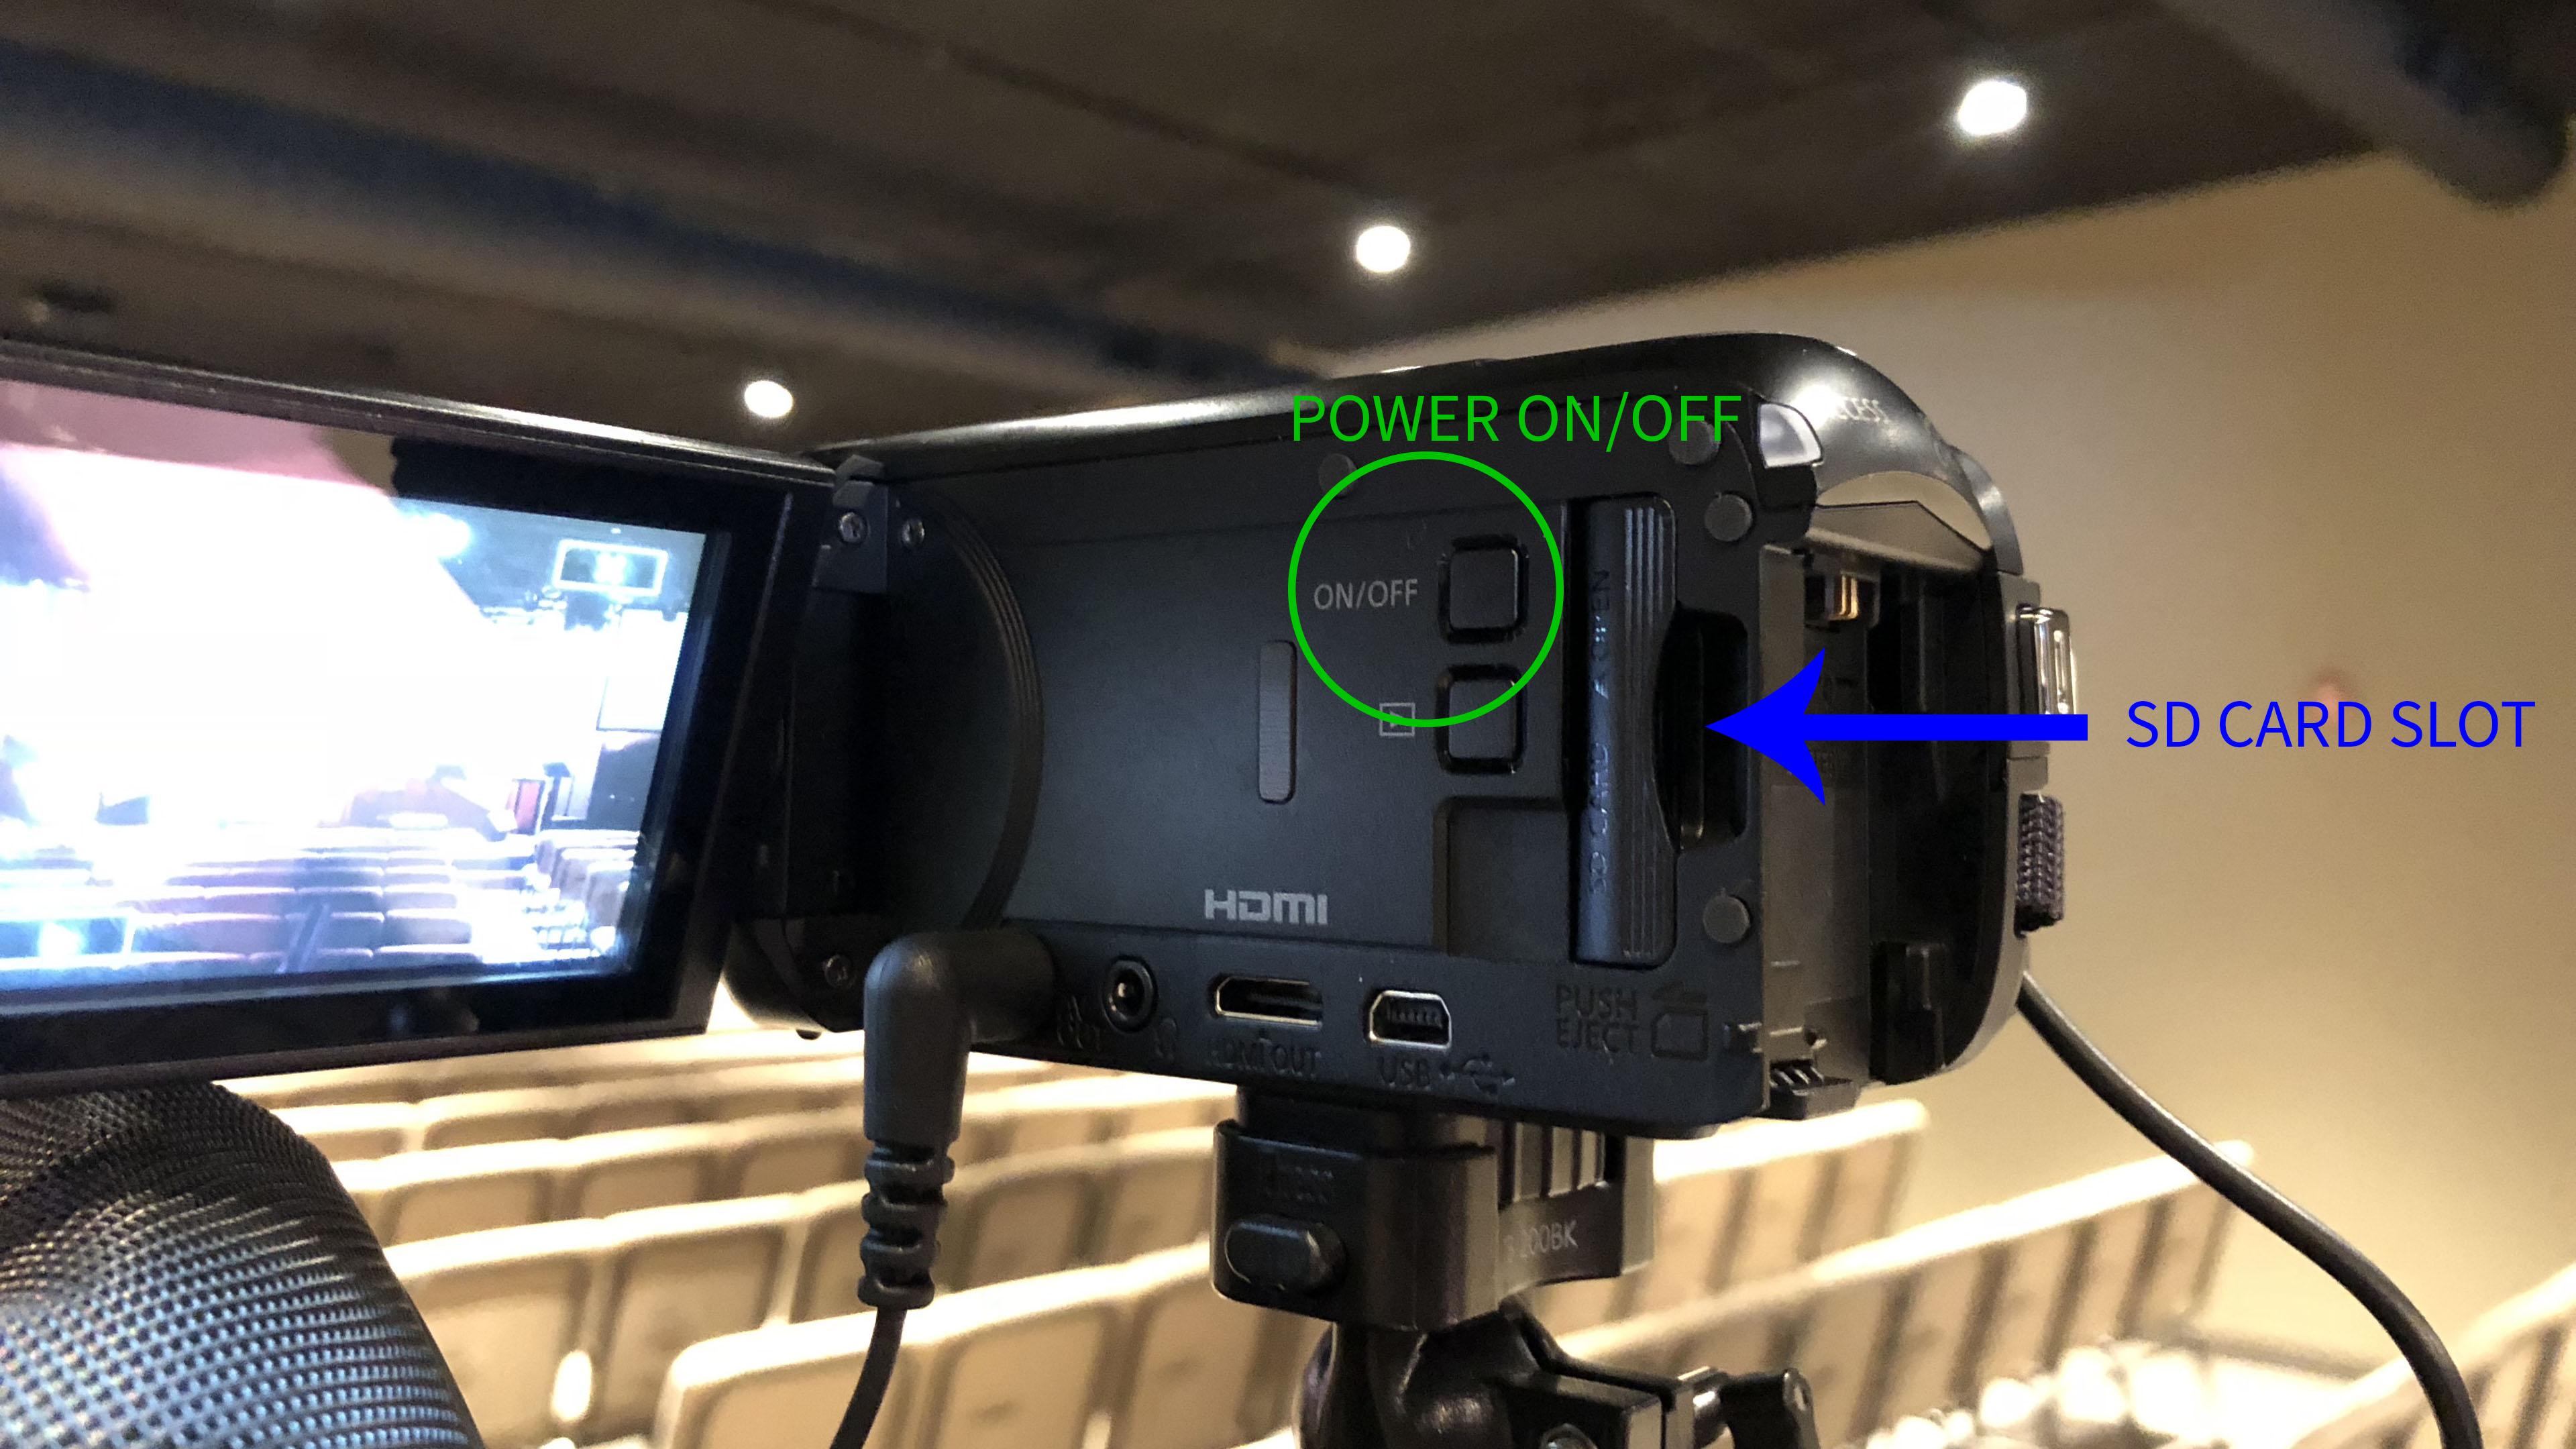
- Open SD card access door at the back left corner of the camera.
- Insert card into slot and press until seated in camera.
- Close SD card access door.
- Power on camera by pressing the power button on the left side
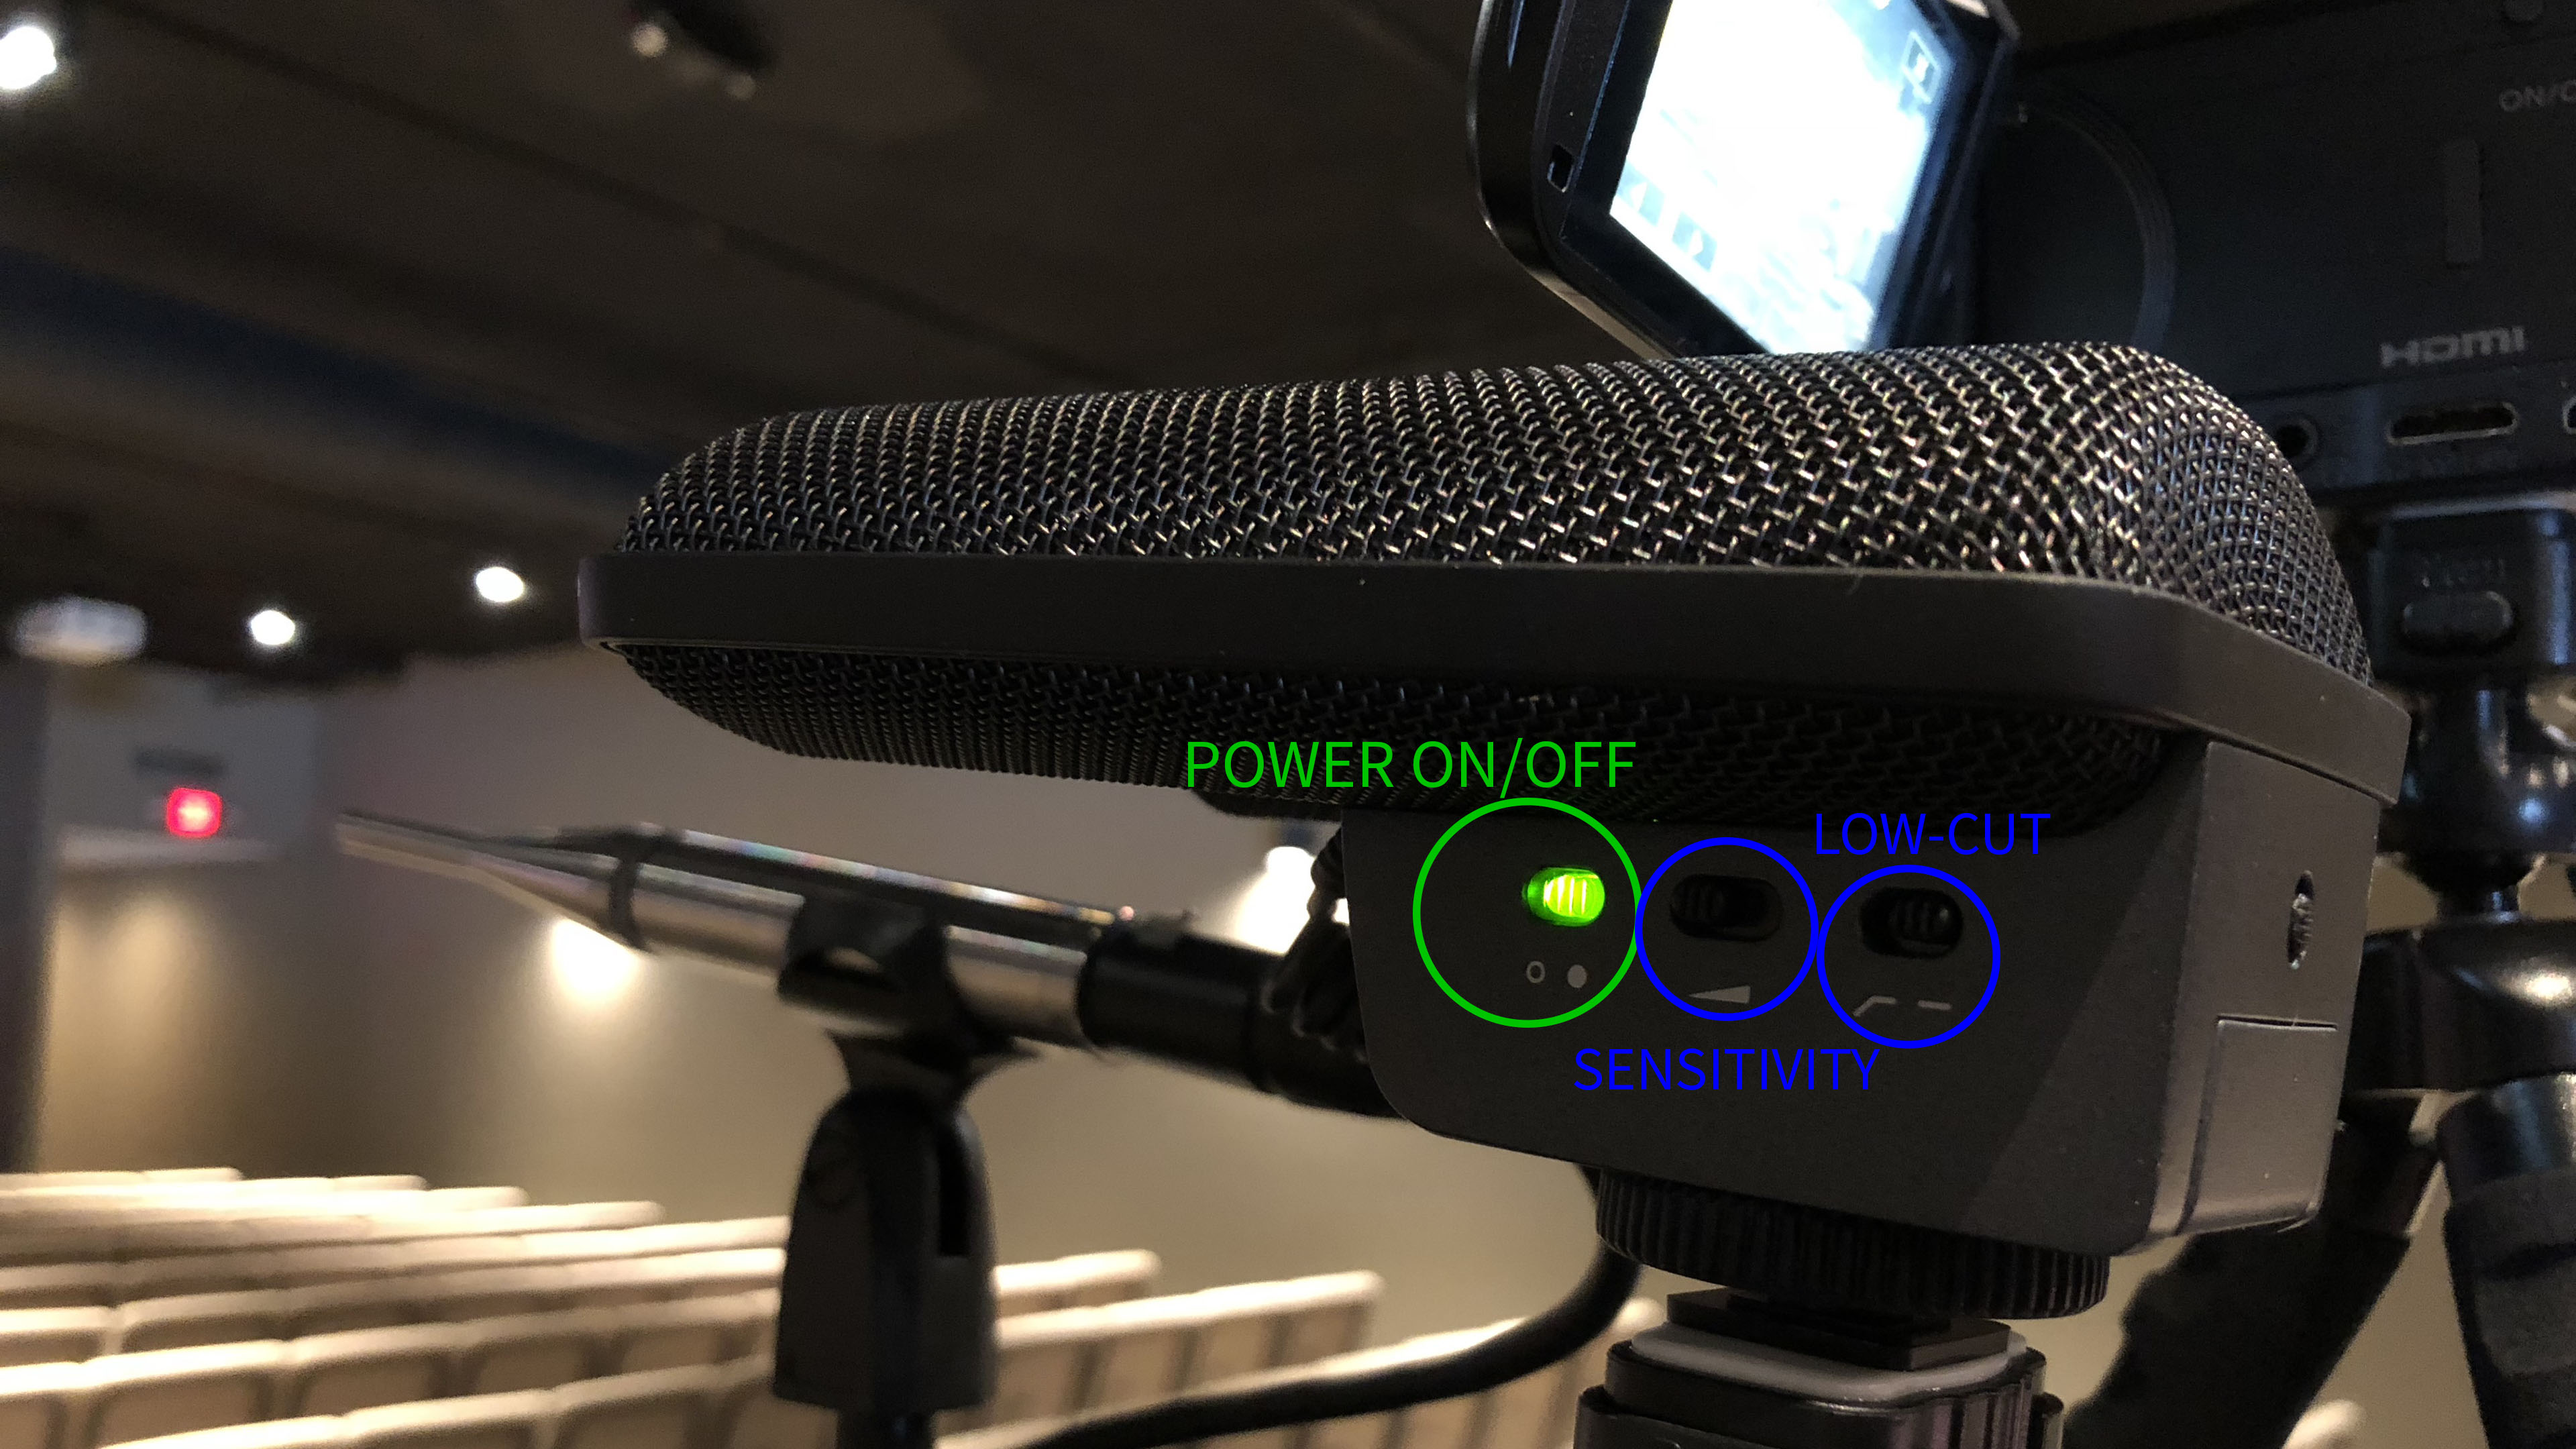
- Power on microphone by sliding the front switch on the microphone’s left side
- Power switch will glow green with the microphone is powered.
- If the microphone doesn’t power on, try changing the batteries by sliding the switch on the back of the microphone down. (Requires 2-AAA Batteries)
- Confirm settings on the left side of microphone
- Sensitivity set to lowest setting (switch pushed furthest to the left).
- Low-cut filter is set to off (switch pushed furthest to the right).
5 Minutes Before Service Starts
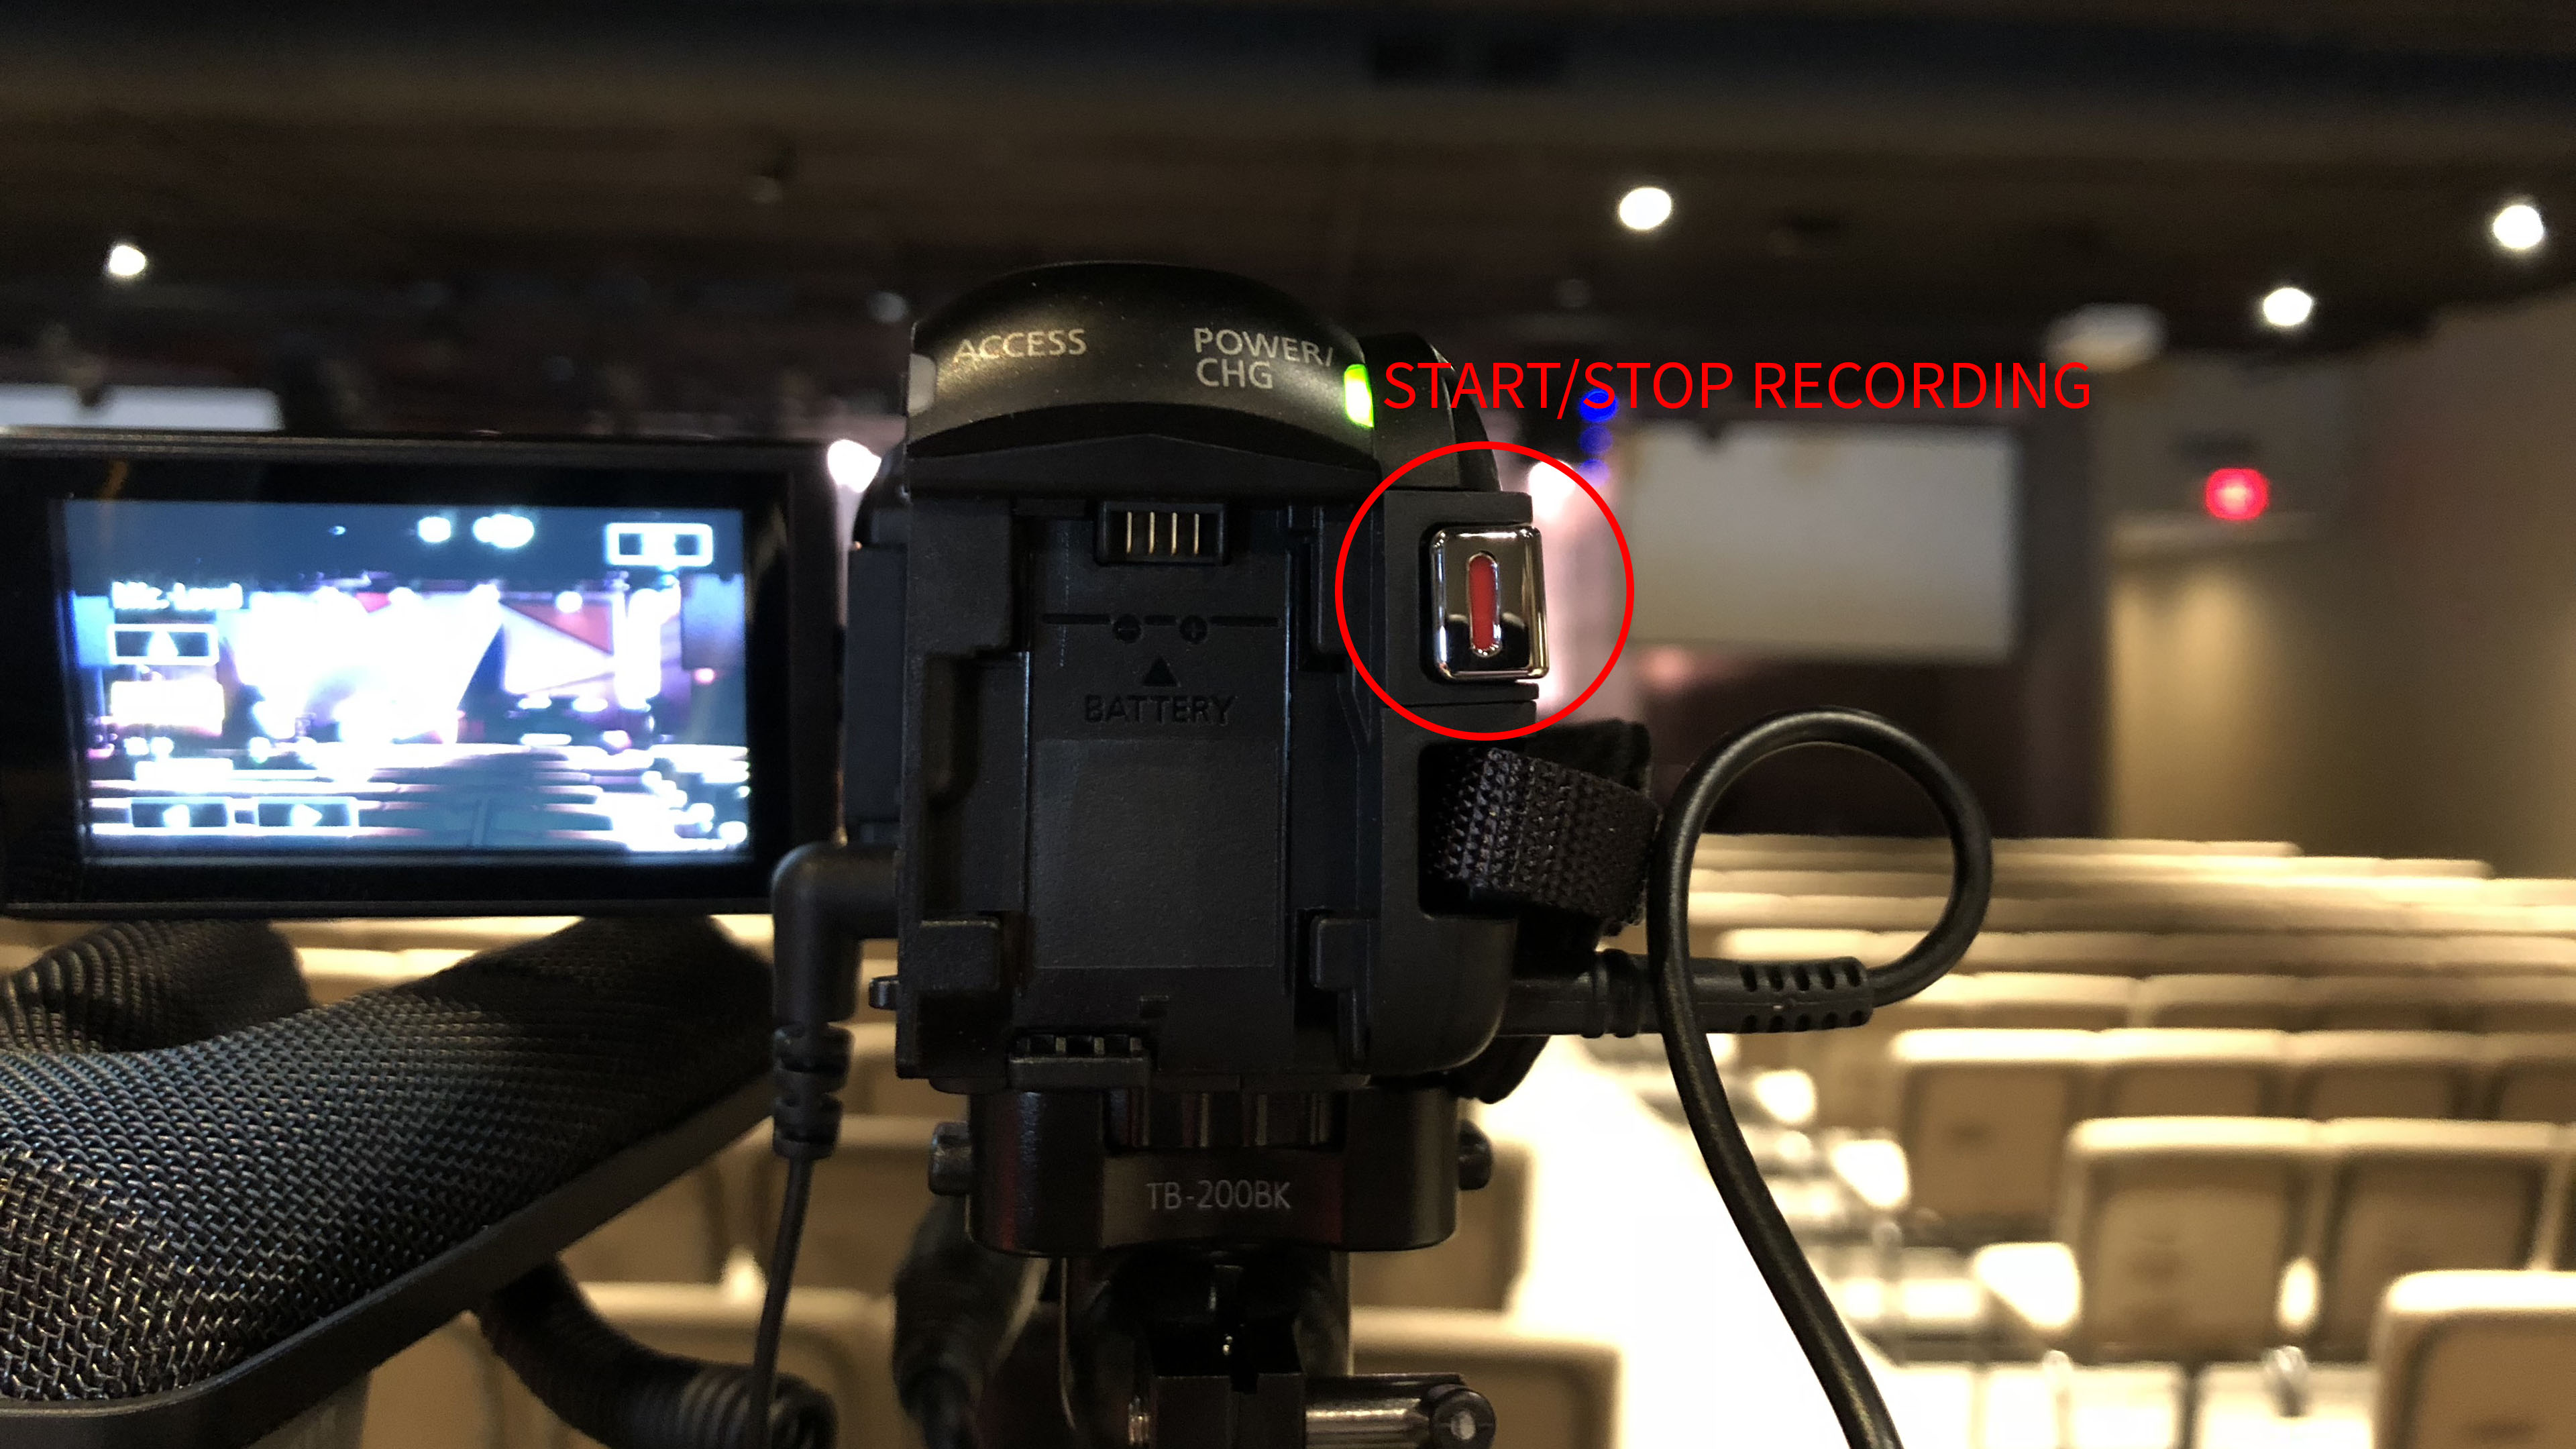
- Start recording by pressing the red button on the back of the camera
- Stop recording during the announcements before the message.
- Start recording again during the prayer at the end of the message.
- Stop recording after the last song, or band outro if applicable.
After Service
- Power off camera by holding down the power button on the left side of the camera
- Display on camera will turn off when camera is powered down.
- Power off microphone by sliding front switch on microphone’s left side
- Power switch on microphone will stop glowing green when powered off.
- Remove SD Card
- Open SD card access door at the back left corner of the camera.
- Press on SD card to eject from camera. Remove SD card from camera.
- Close SD card access door.
- Place SD card in black production bin