Riverview Camera Operator Checklist
READ THROUGH THIS DOCUMENT BEFORE EVERY SERVICE
If you are having problems, don’t be afraid to ask for help! Contact Richard Vissers or Josh Nunn via the Production Team Contact card in front of the Presentation iMacs.
Before Service
General
- Power on both cameras and open lens caps.
- Power switch is on the back under the eyecup viewfinder. Lens cap is on the front left side of lens. This is the same on both cameras.
- Power on Ikan monitor
- Power on the video capture iMac.
- Power button is on the back in the lower left corner.
- Wake up the Video Control PC.
- PC is located to the left of the camera platform. Click the mouse to wake up.
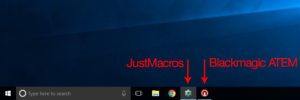
- Confirm that both the Blackmagic ATEM software and the JustMacros software is running.

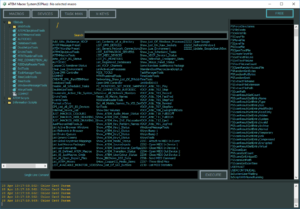
- The JustMacros program can be minimized, but not closed. ( – )
- Plug in the USB cable for the BlackMagic recorder located at the back left of the iMac.
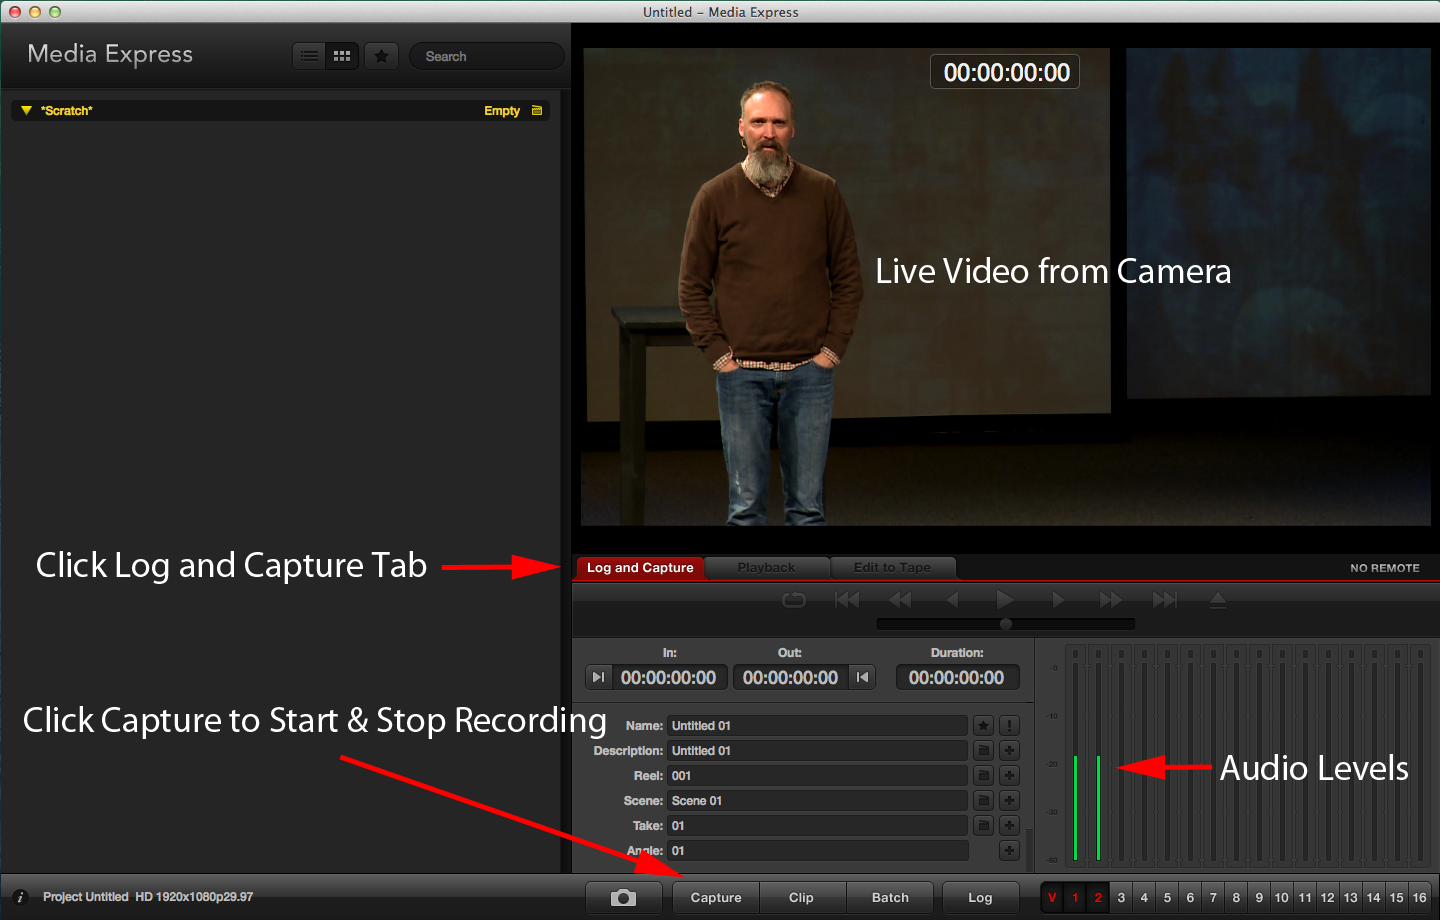
- On the iMac, open Media Express program (Stopwatch icon at the bottom of the screen).
- Click “Log and Capture” tab at the bottom of the preview window.

- Power on IMAG screens
- IMAG Projectors are bookmarked in Safari. Login is “IMAG”, no password.
- Power on Lobby TV’s
- Remote is located to the right of the Primary iMac.
- Verify the video presets are working on IMAG and lobby TV’s using the tripod mounted switch control.
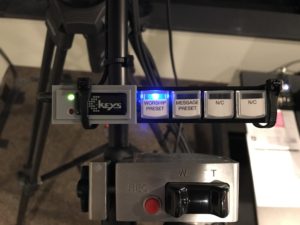
- “Worship” preset should push the series background to the IMAG screens and the Primary screen slide to the lobby TV’s.
- “Message” preset should push the follow camera video to the IMAG screens and the lobby TV’s.
- Switch back to Preset “Worship” when you’re done.
- Ask the speaker to stand on stage.
- Make sure he takes his mic.
- He should stand on the center of the carpet with his head up.
- Ask for stage and house lights to be set to “Message.”
- Ask for the speaker’s mic to be turned on.


Sony PXW-Z280 (Fixed Camera)
This shot is used for the teaching at our venues on Sunday morning and also goes online. It is important to get it right.
- Verify that headroom, framing, focus, and zoom are correct. They should need no adjustment.
- Headroom: The top of the Stage TV should line up with the top box line on the monitor.
- Framing: The speaker should be center frame when he is centered on the carpet. The TV should be completely in the the frame. Noel’s table will be half out of frame.
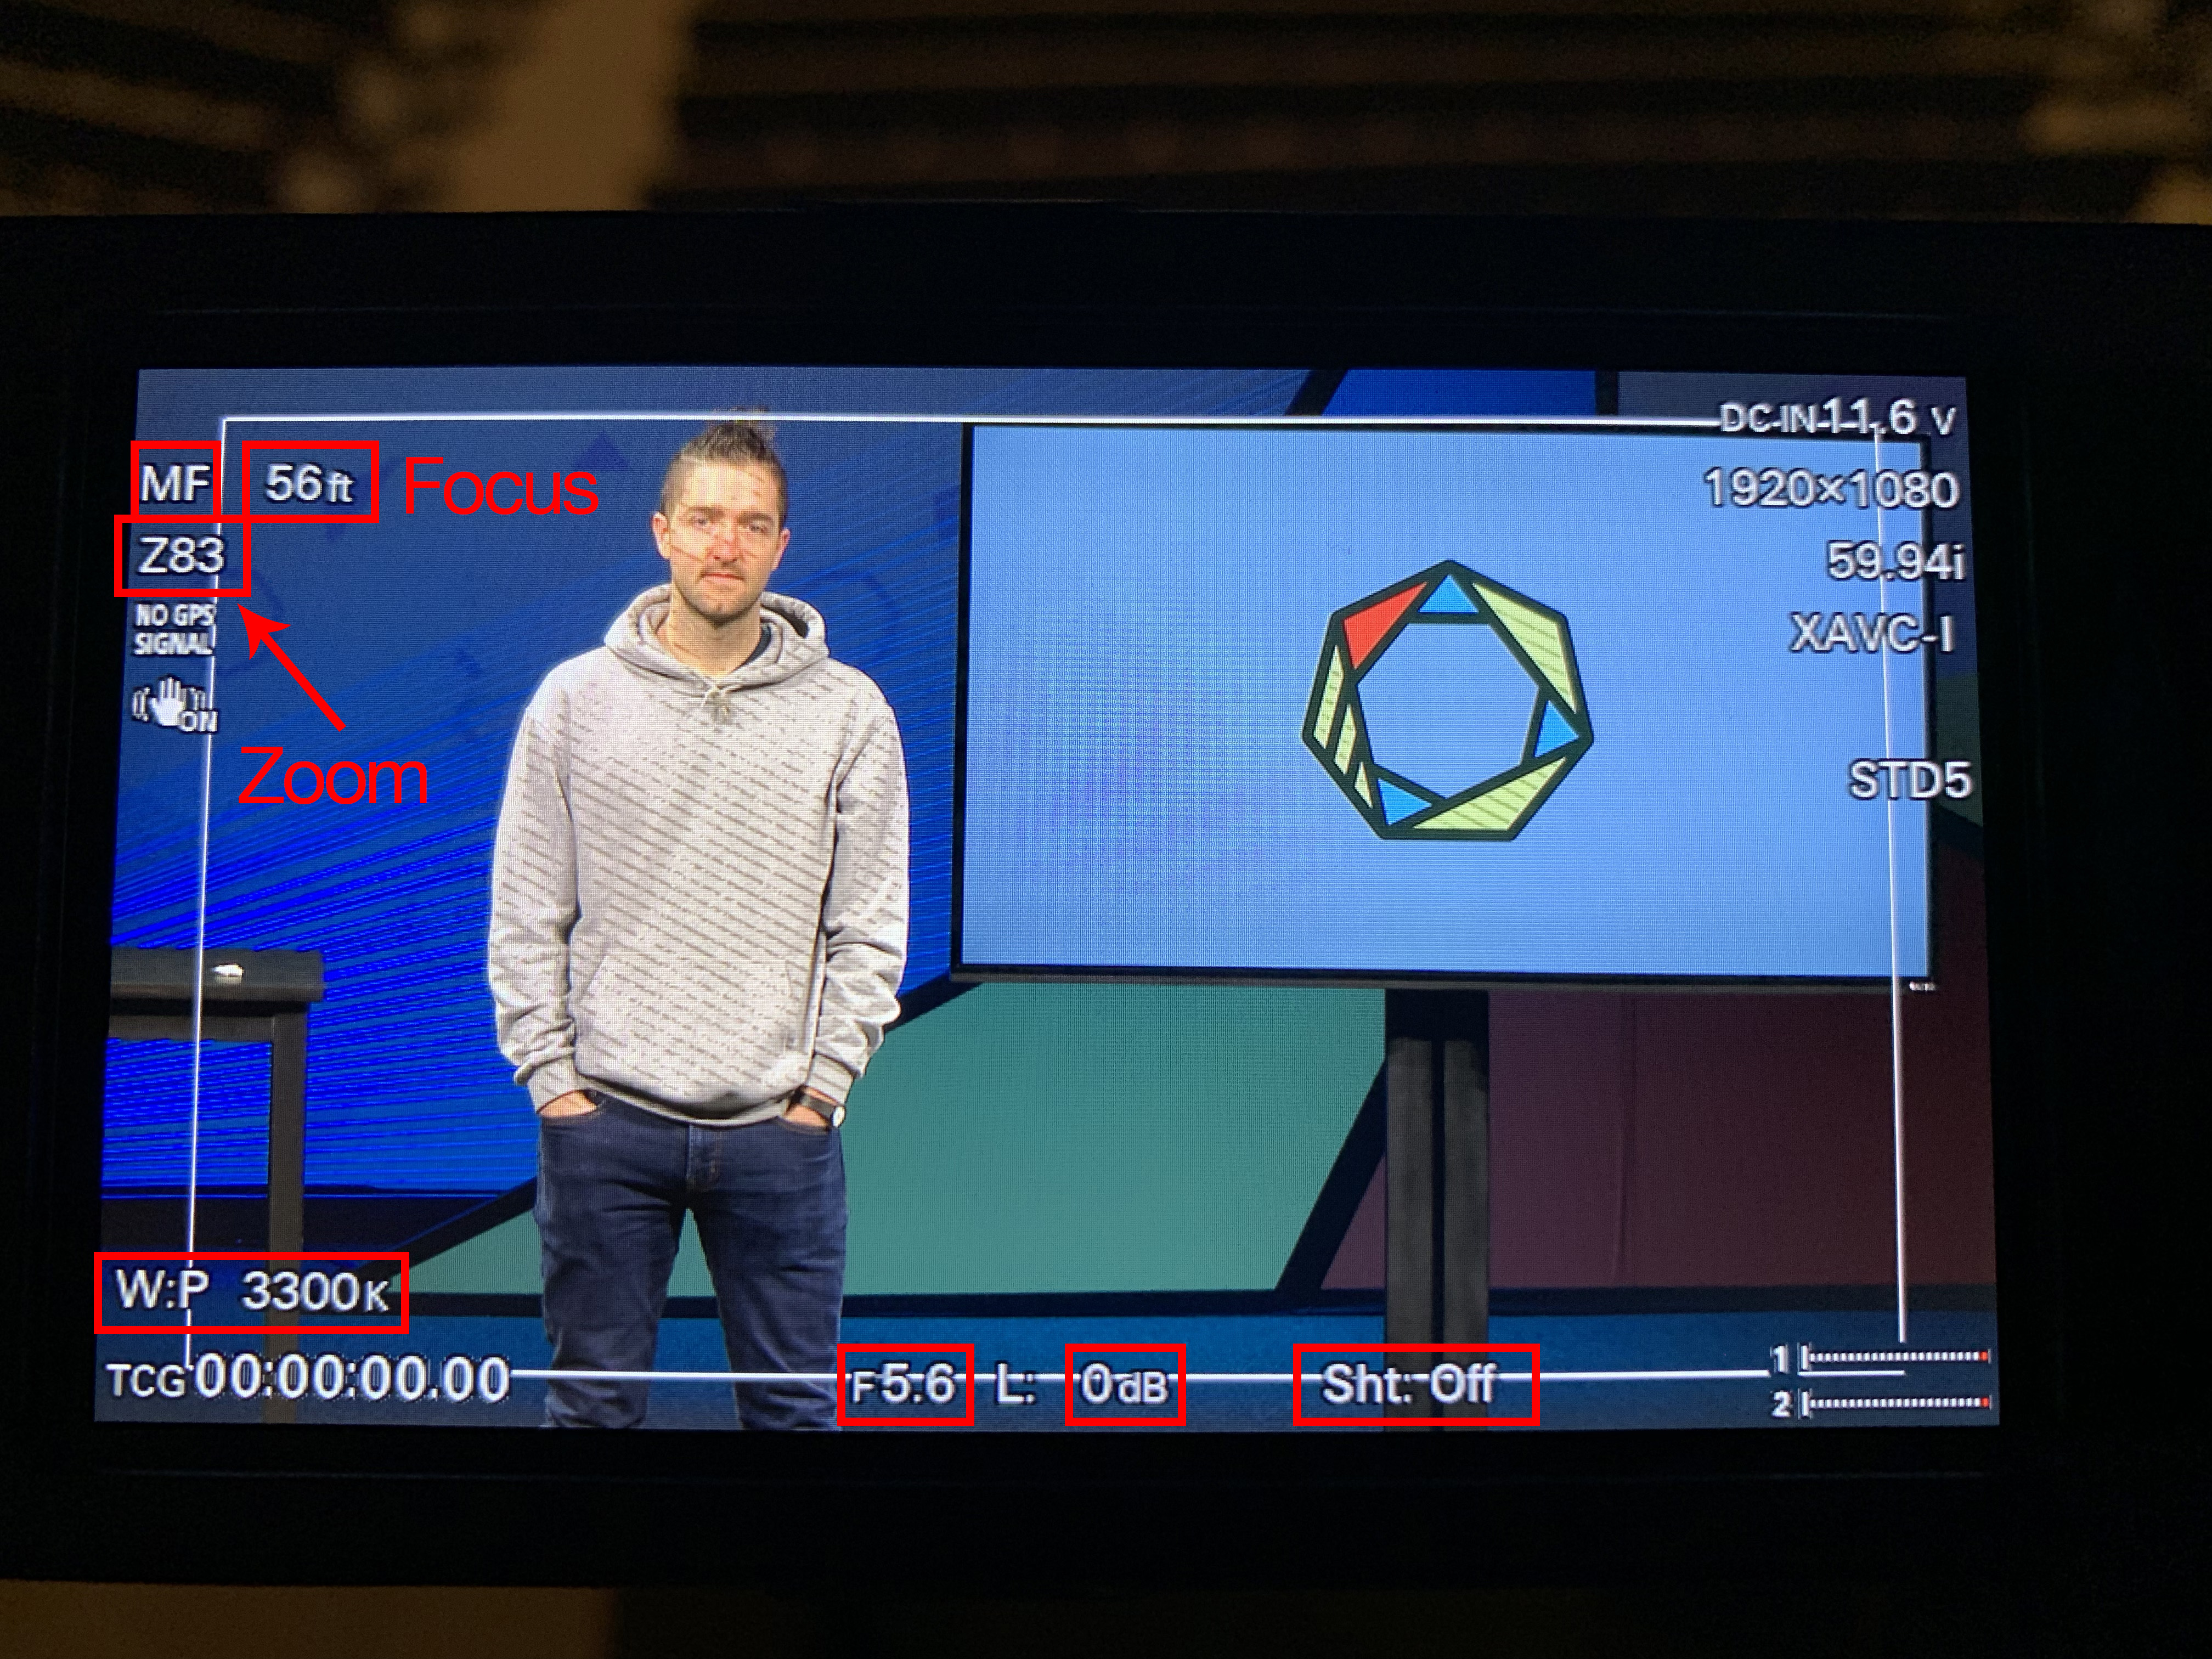
- Zoom: Have the speaker walk to the left and right edges of the carpet. He should be close to the edge of the frame, but not pass out of frame. Zoom will display “Z83” on display when correct.
- If any of these are off, refer to the top of this document and ask for help.
- Check Focus
- Use the focus ring to set focus if necessary.
- Turn the largest, front most ring on the front of the camera to adjust. The proper adjustment will display “56ft.”
- Check audio level and quality.
- Ask the speaker to talk. Verify that the audio meters on the recording decks are averaging about 2/3 to 3/4 up the scale. Listen to the headphones attached to the camera to confirm that it sounds clean.
- If audio sounds bad or the level is too high or low, work with the sound person to get it fixed.
- Verify that all the other settings are as follows (displayed on the flip out screen):
- Zoom 83
- MF*
- W:P 3300K
- F5.6
- 0dB
- SHT:Off
- Focus 56ft
Sony PXW-X200 (Follow Camera)
- Display the Camera feed on the Ikan monitor.
- Press the “HDMI” button on the Ikan monitor to access. It may take a few seconds to appear.
- Verify that headroom, focus, and zoom are correct.
- Headroom: The top of the speakers head should touch the white box on the monitor.
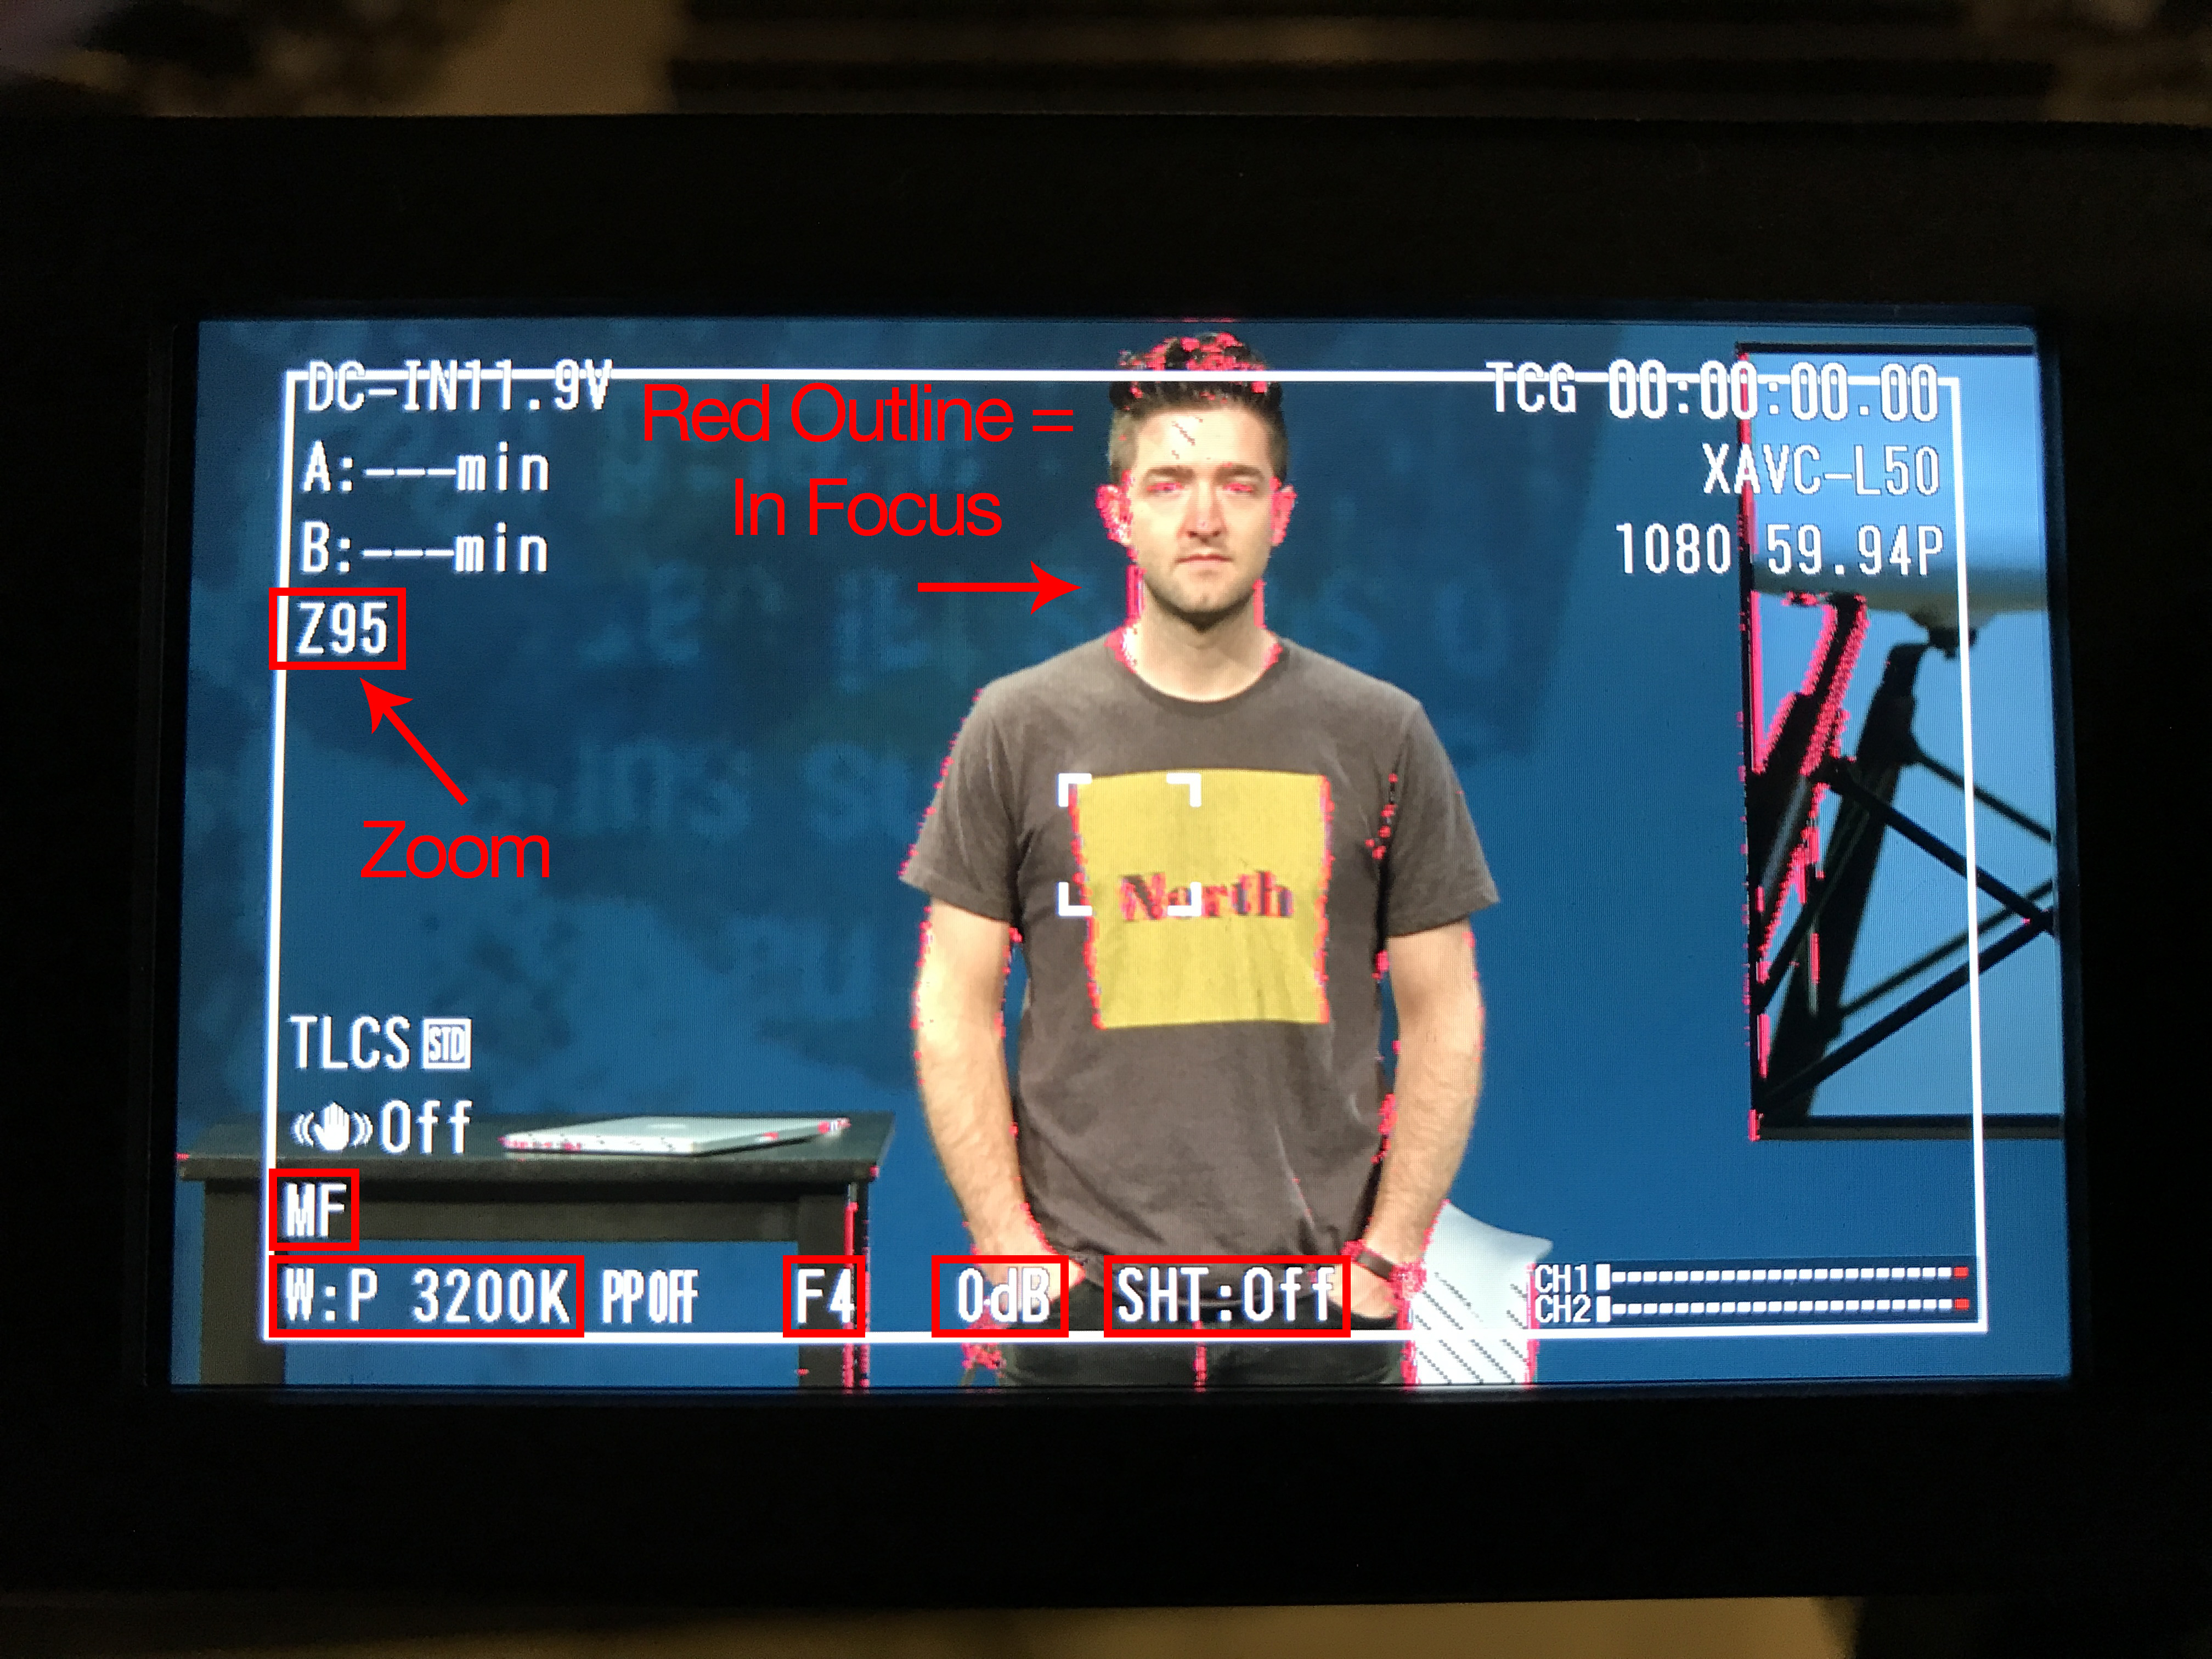
- Focus: Look on the attached monitor. The speaker should be outlined in red when in focus. If necessary, turn the largest, front most ring on the front of the camera to adjust. Be sure to move the focus ring back and forth to find the sweet spot.
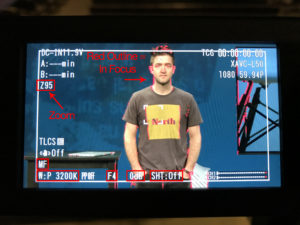
- Zoom: The speaker should be visible from head to just below the waist. Zoom will display “Z95” on display when correct.
- If any of these are off, refer to the top of this document and ask for help.
- Verify that the white balance switch (lower left side of the camera) is set to “PRST.”
- Set iris. (Furthest ring toward back of camera).
- Use the zebra stripes on the attached monitor. You should see some striping on the speaker’s cheeks and forehead, but make sure that you don’t have any areas on the face that are “blown out.”
- When set correctly, Iris should end up around F4.
- Verify that all the other settings are as follows (displayed on the attached screen):
- Zoom 95
- MF*
- W:P 3200K
- F4
- 0dB
- SHT:Off
- If the speaker has any special requests or props, practice with him to make sure you can frame them correctly.
Production Meeting
- Make sure you know about any unusual elements in the service. Ask if you should record or display anything other than the teaching.
- Are there any props that may require special framing?
- Figure out your Cue In.
- How many songs before the teaching?
- What is the last song before the teaching? Will the music leader pray after the song ends?
- Will there be an intro video? If so, how long is it?
- Figure out your Cue Out.
- How will the teaching end? Prayer? Gifts and offering?
- Are there any unusual elements at the end of the teaching?
During Service
- Last Song of First Set Begins
- Start Recording on all Blackmagic decks. The record buttons should glow red.
- Start capturing on iMac by clicking the “Capture” button. The computer will display “Capturing to Disk”
- Cue In
- Wait for the Presentation Operator to click on a black slide.
- Press the “Message Preset” button on the XKeys control attached to the tripod.
- Be on your toes – don’t switch before the song ends, but don’t wait once the screens go black.
- Quickly check the IMAG screens to verify the switch.
- Now your camera is hot! Be careful not to bump the camera or shake the platform.
- Run Camera. Be awesome.
- Be sure to let the speaker “push the frame.” Move the camera when the speaker touches the white box outline on the monitor. Try to keep all of the speaker’s body in the frame, but let the speaker walk to the sides of the frame before centering up again.
- Watch for when the speaker reads scripture. Frame the speaker on the left side and the entire Stage TV in while scripture is being read or the speaker is reading off the TV. You can move again once the speaker is done reading. If you have to choose between getting the TV or speaker in frame, follow the speaker.
- Cue Out
- Press the “Worship Preset” button on the XKeys control attached to the tripod.
- Be on your toes – don’t switch before the speaker finishes.
- Be sure to check the IMAG screens to verify the switch.
- Press the “Worship Preset” button on the XKeys control attached to the tripod.
- After Response (Offering)
- Stop Recording on all the Blackmagic Decks. The stop buttons should glow green.
- Stop Recording on the iMac by clicking the “Capture” button again.
After Service
- Saturday Night
- Power down both cameras. Shut the lens caps.
- Power down the Ikan Monitor.
- Power down the IMAG screens.
- Wait until most people have left the auditorium.
- Power down the lobby TV’s.
- Wait until most people have left the lobby.
- Sunday 9:30
- Leave everything on and setup.
- Double-check that you have stopped recording on the iMac and Blackmagic deck.
- Sunday 11:30
- Power down both cameras. Shut the lens caps.
- Power down the Ikan Monitor.
- Power down the IMAG screens.
- Wait until most people have left the auditorium
- Power down the lobby TV’s.
- Wait until most people have left the lobby.
Backup Video Switch Control
- If the XKeys controller on the camera tripod isn’t working, there are 2 backup ways to switch the camera on during the service.
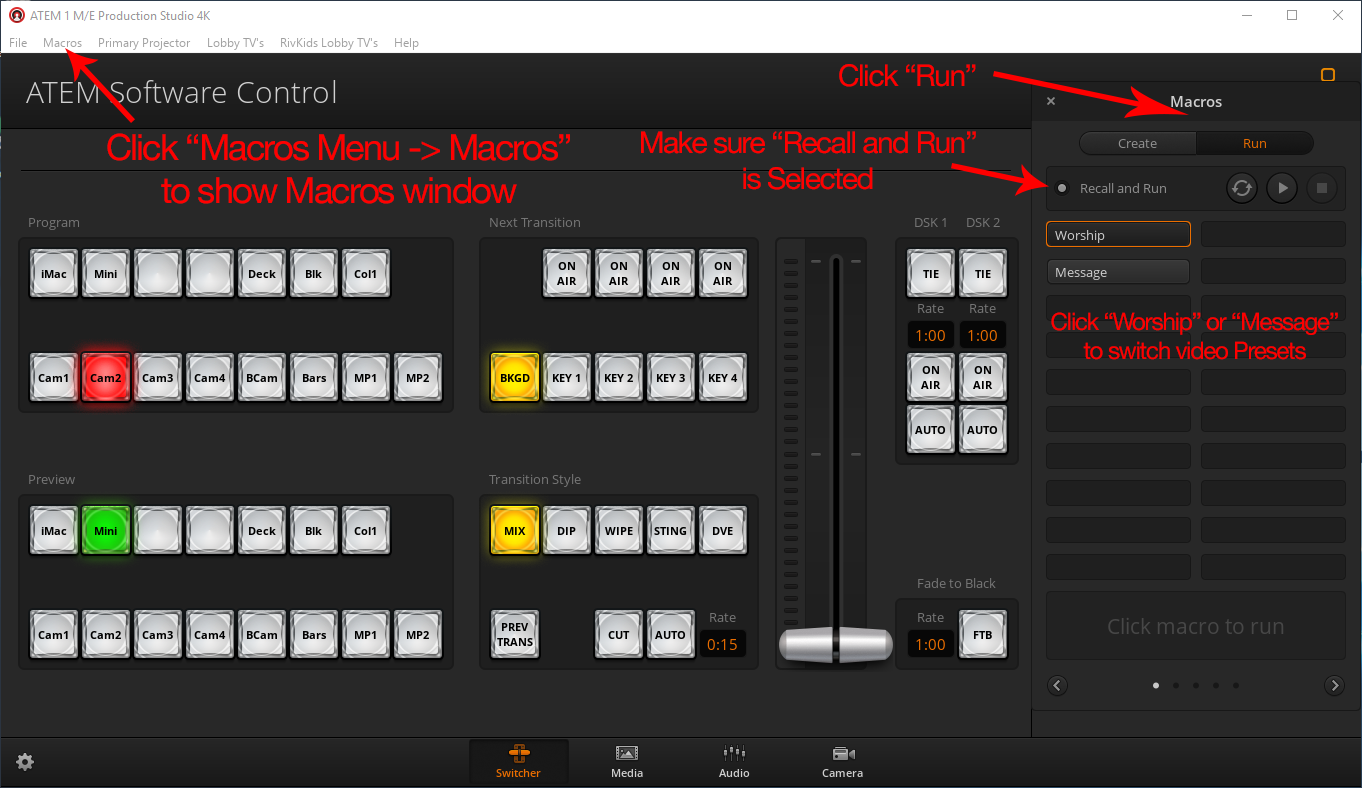
- Switch using the Blackmagic ATEM Software on the PC.
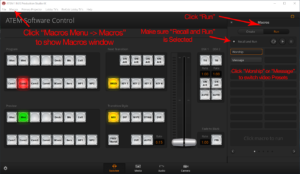
- Click on the “ATEM 1ME Production Studio 4K” window.
- Click on the “Macros” menu and select “Macros” to show the macros window.
- In the “Macros” window, click the “Run” button.
- In the “Macros” window, click the “Recall and Run” button until highlighted.
- In the “Macros” window, click on either the “Worship” or “Message” buttons to switch the camera on or off.
- Switch using the Blackmagic ATEM Software on the iMac.
- Open the Blackmagic ATEM Software (Red & White Circle icon in the Dock).
- Follow the instructions for the PC version. Both versions are the same and will function simultaneously.