With the multitude of bands at Riverview, we use arrangements to keep our songs consistent and organized from week to week. Each band should have their own arrangement setup in ProPresenter to allow multiple layouts of the same song within the library. While lyrical content is centralized, song order such as verse, chorus, and bridge can easily be customized for the way each plays a song. Having the correct arrangements not only helps streamline presentation with only the necessary slides available, but it also gives musicians the ability to see what’s coming next via a confidence monitor at our Holt venue.
If you need to make changes to a song arrangement, please keep in mind that any edits to the text on a slide are global and will be reflected in all instances of that slide across all arrangements.
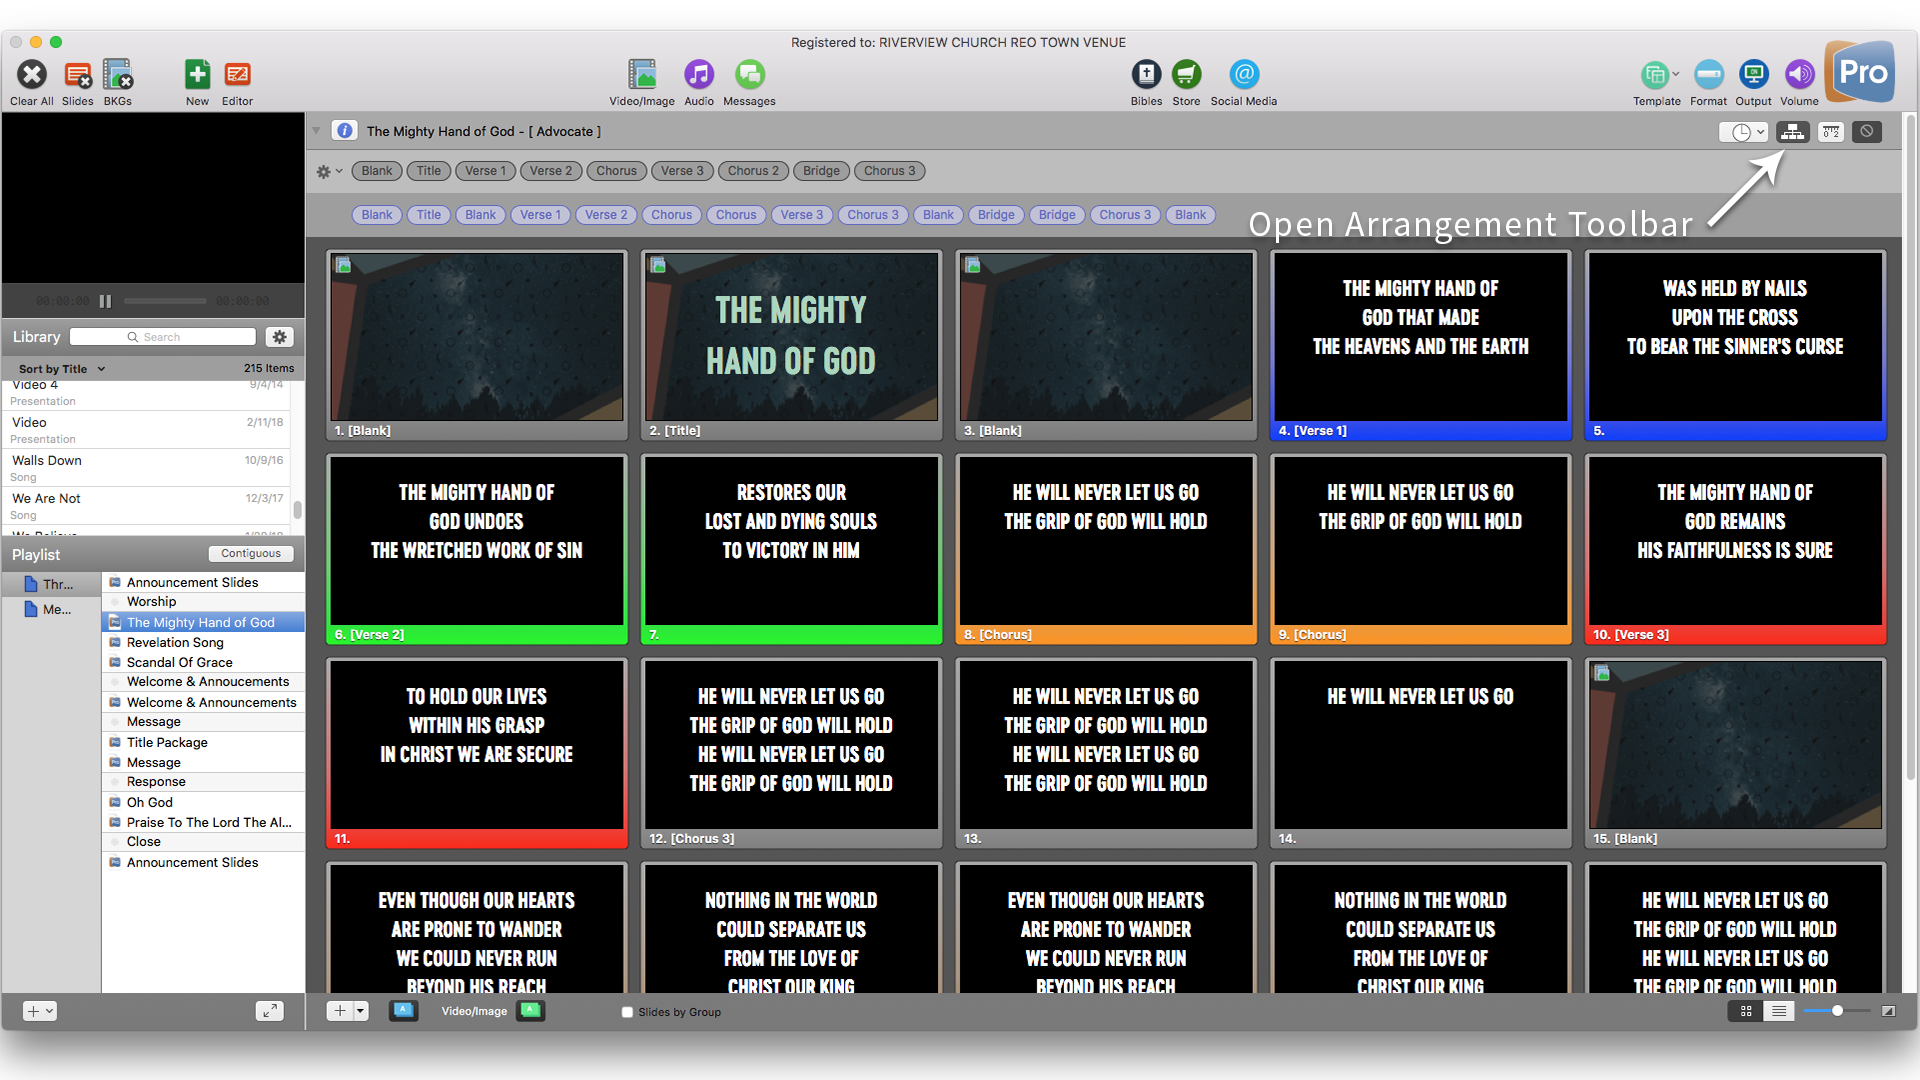
To edit arrangements in ProPresenter, click on the Arrangements button on the top left corner of the screen (beneath the “Volume” button). This will open the arrangement toolbar.
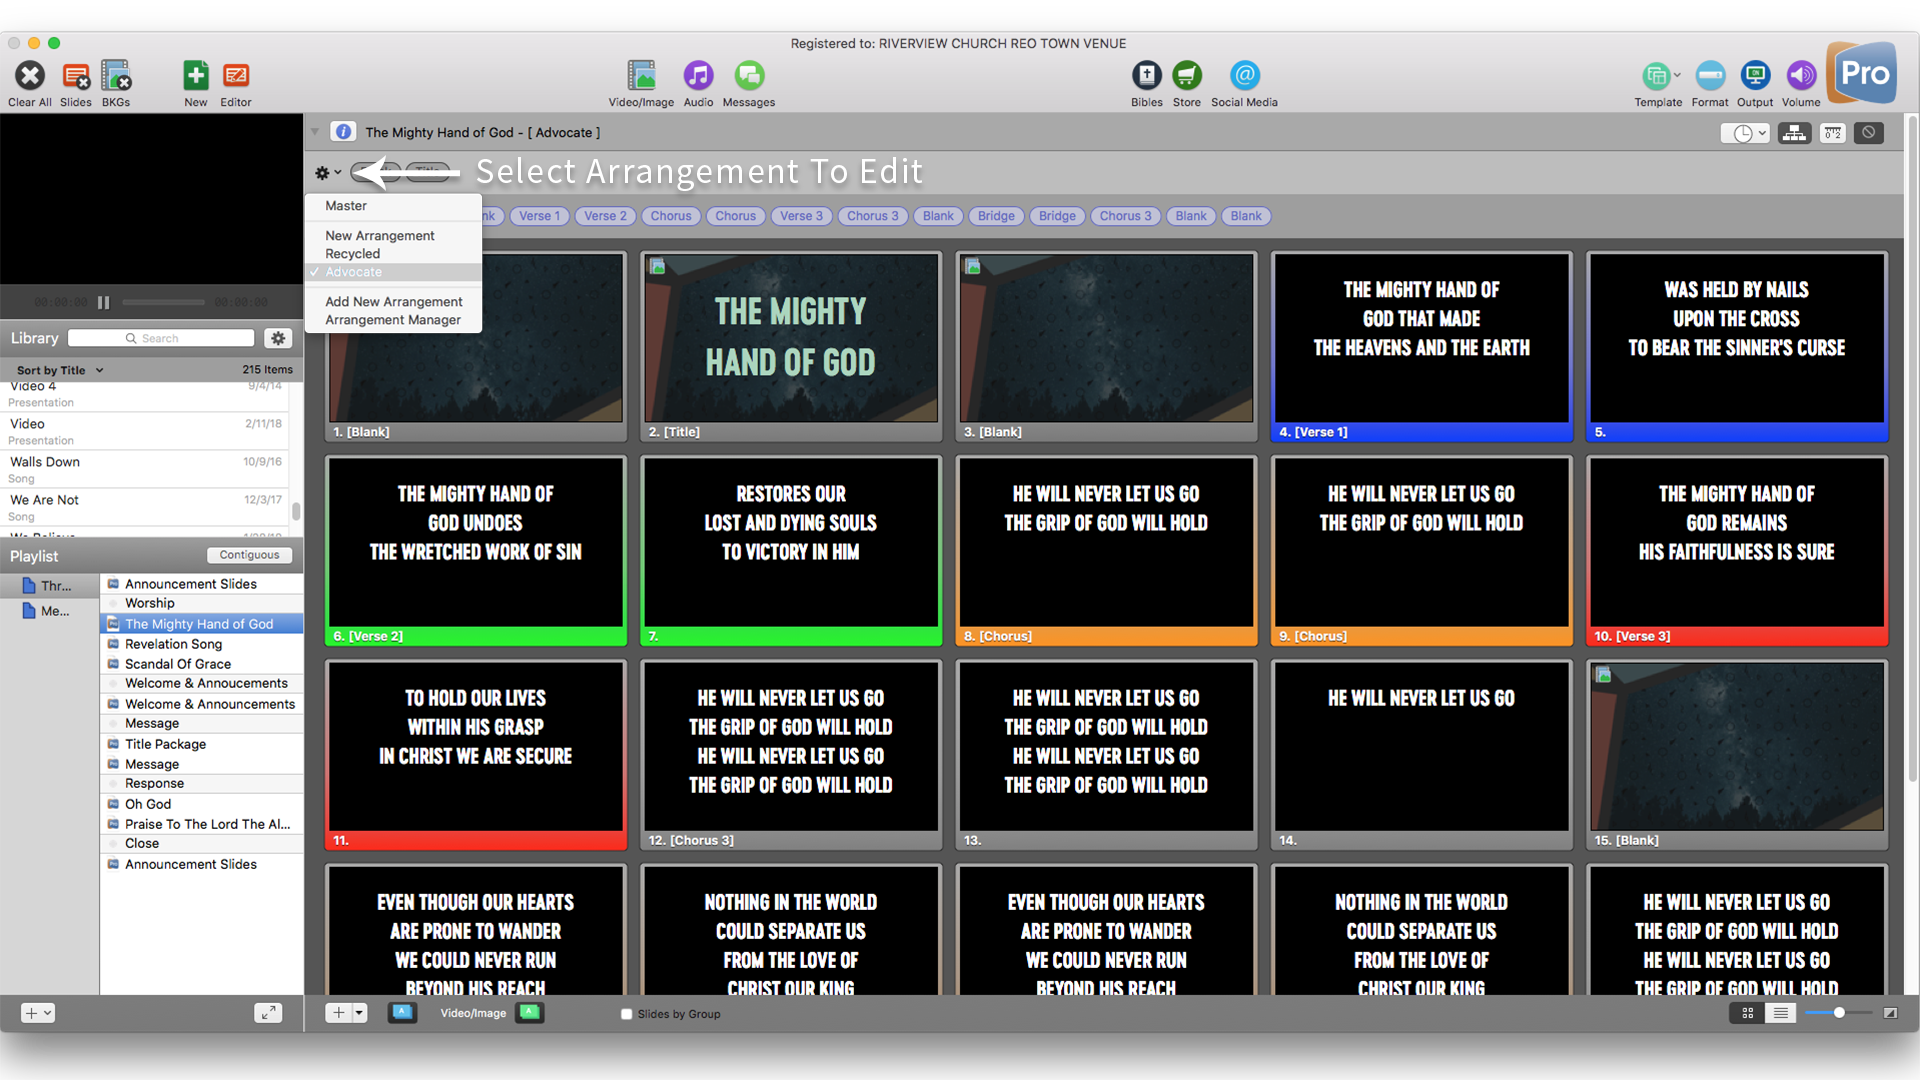
Next pick the arrangement you would like to edit by clicking on the gear at the top left of the arrangement toolbar.
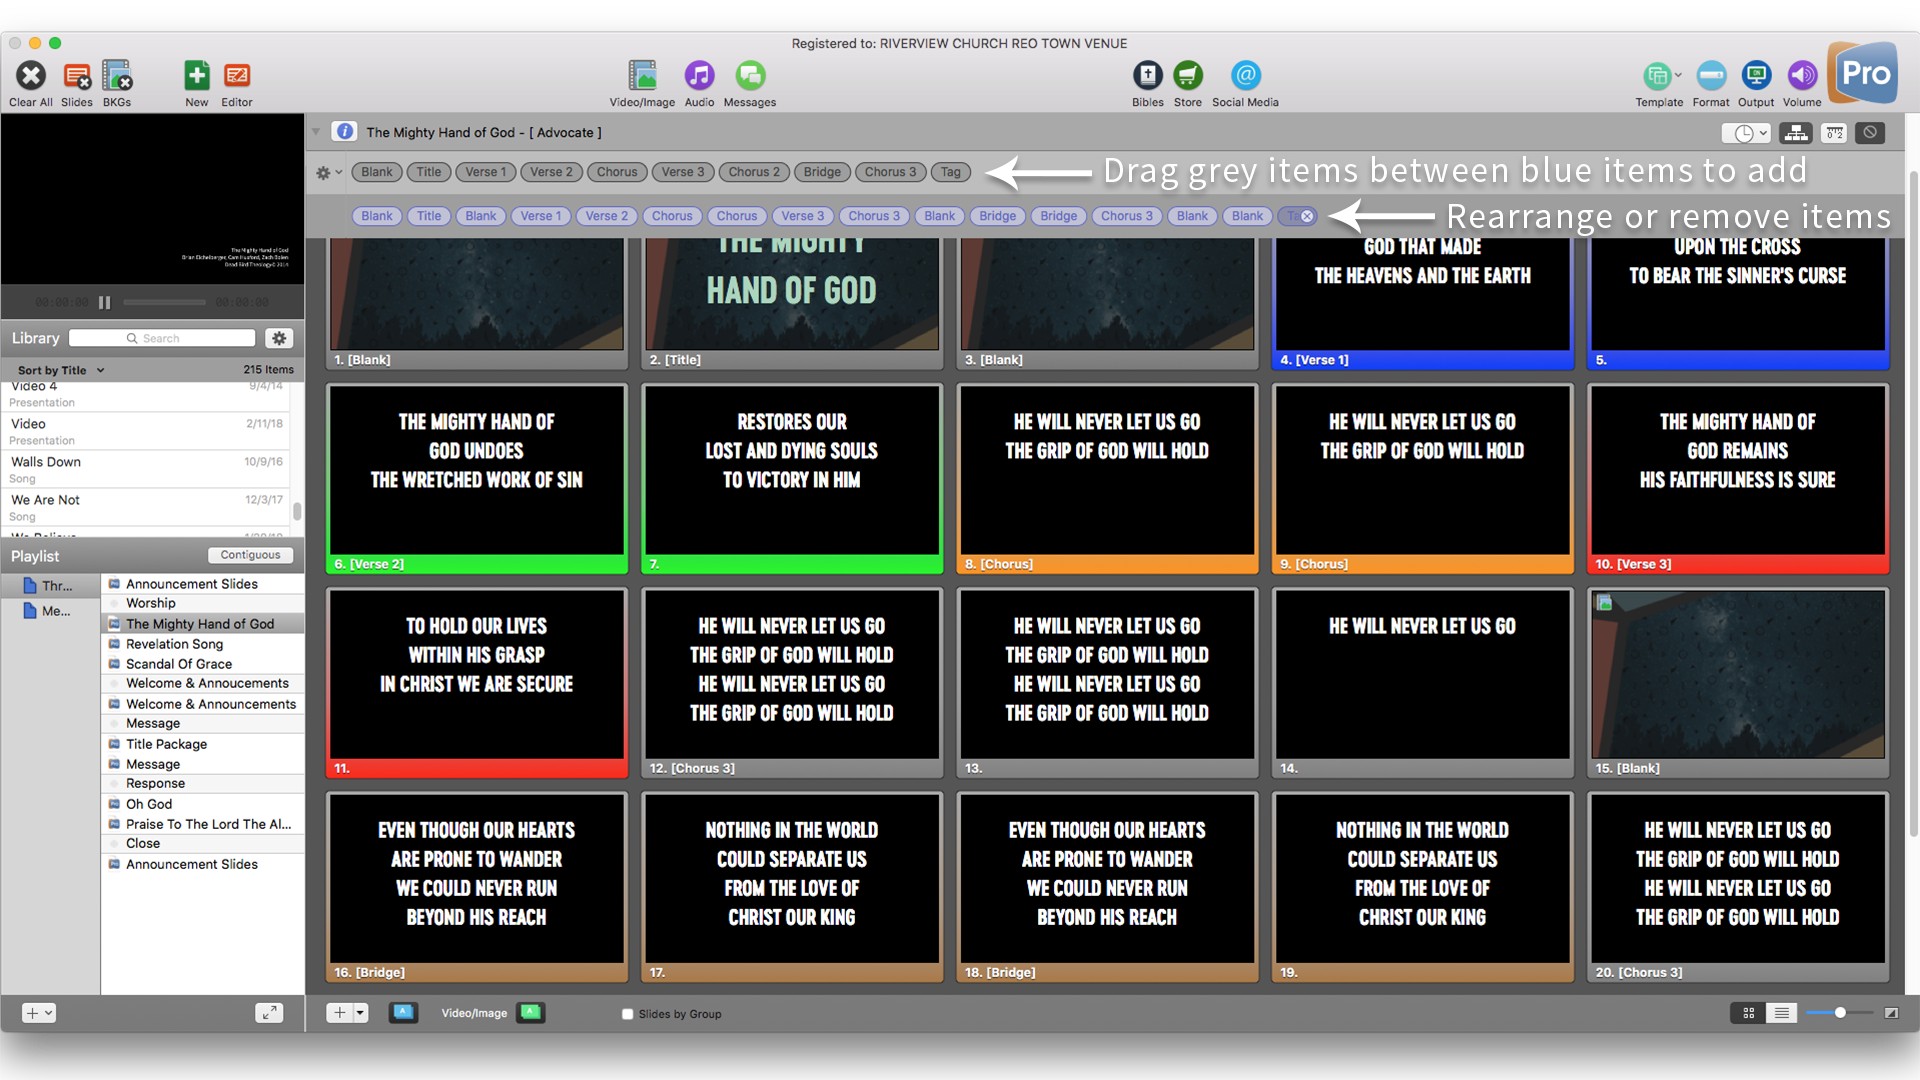
Make adjustments to a band arrangement by clicking and dragging the blue song section bubbles, dragging the template grey bubbles down to the blue bubble line, or clicking the “x” to remove a blue bubble section.
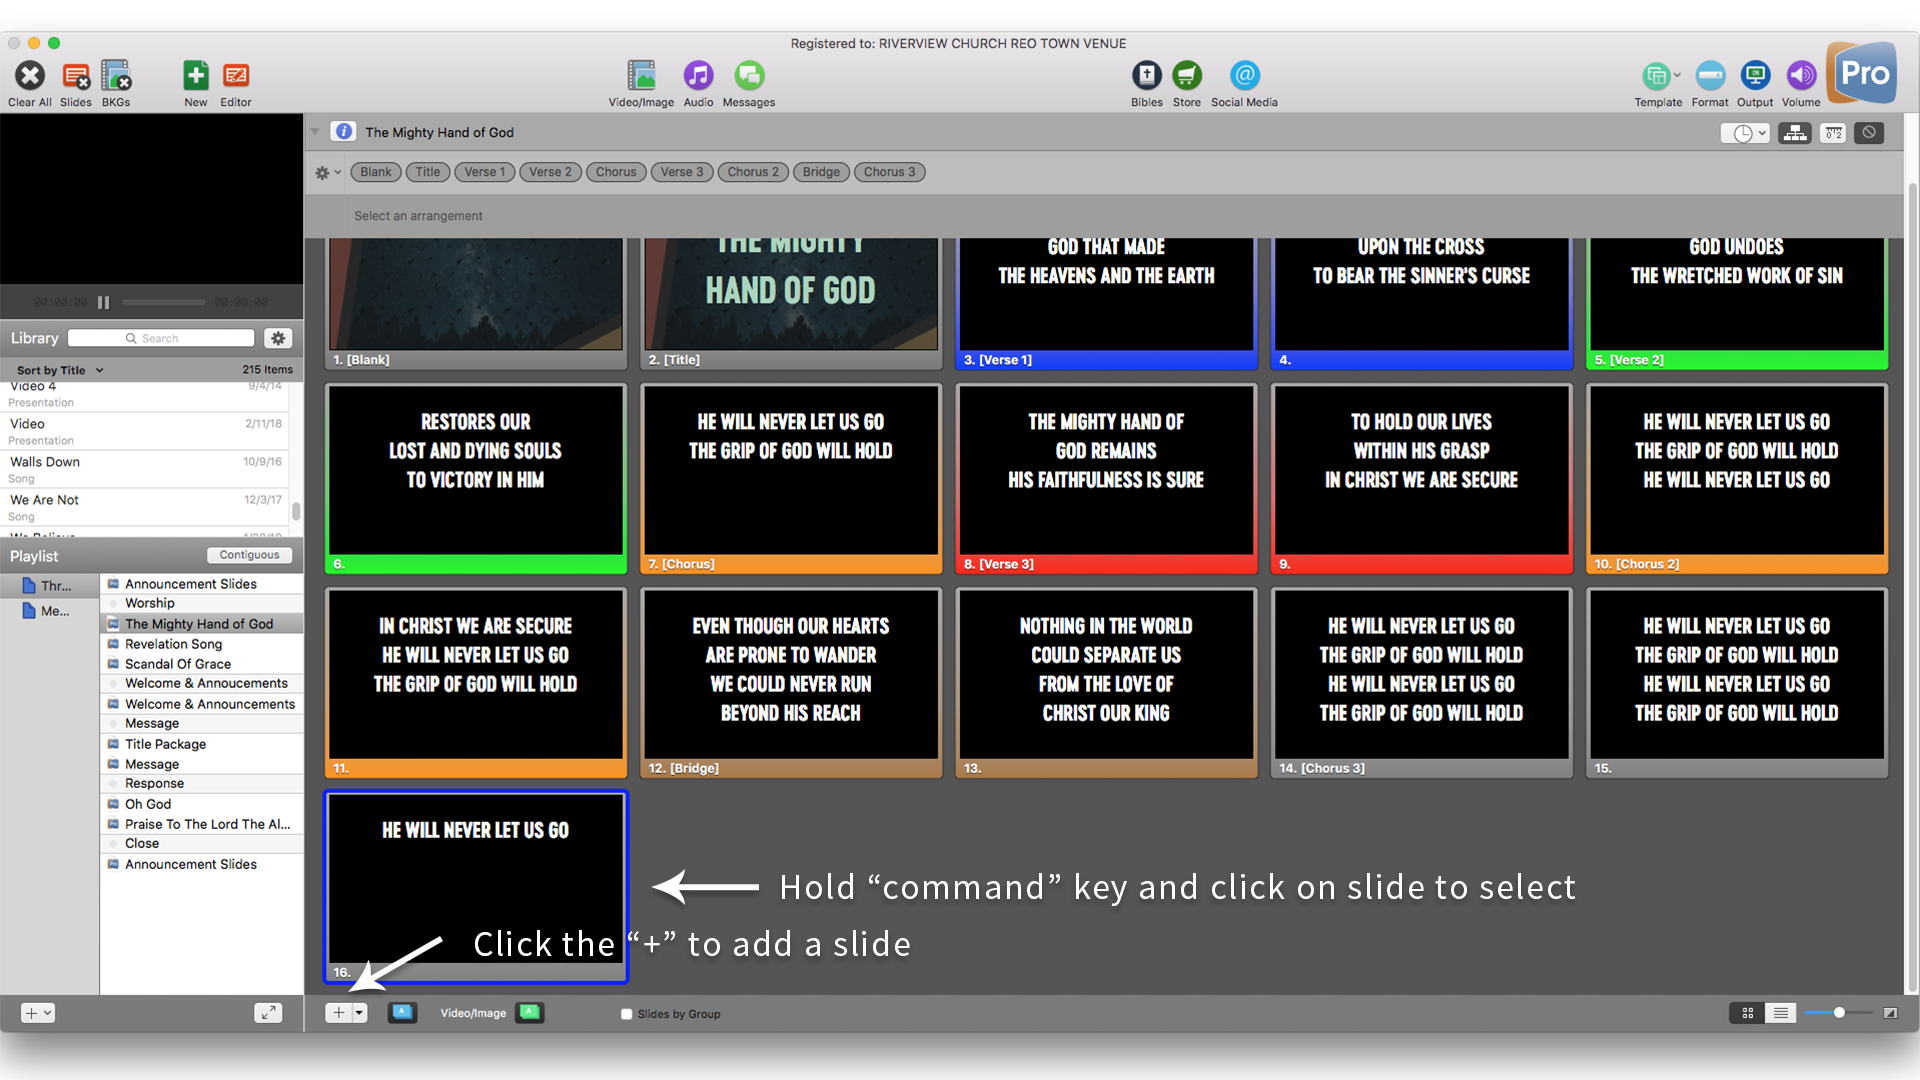
To add a new slide that is not part of the master arrangement (grey song sections), open the master arrangement by clicking on the gear at the top left of the arrangement toolbar. Once the master arrangement is open, hold down the “Command” key on the keyboard and click on the last slide so that it is selected with a blue border. Once the slide is selected with a blue border, click the “+” button in the bottom left corner of the song window.
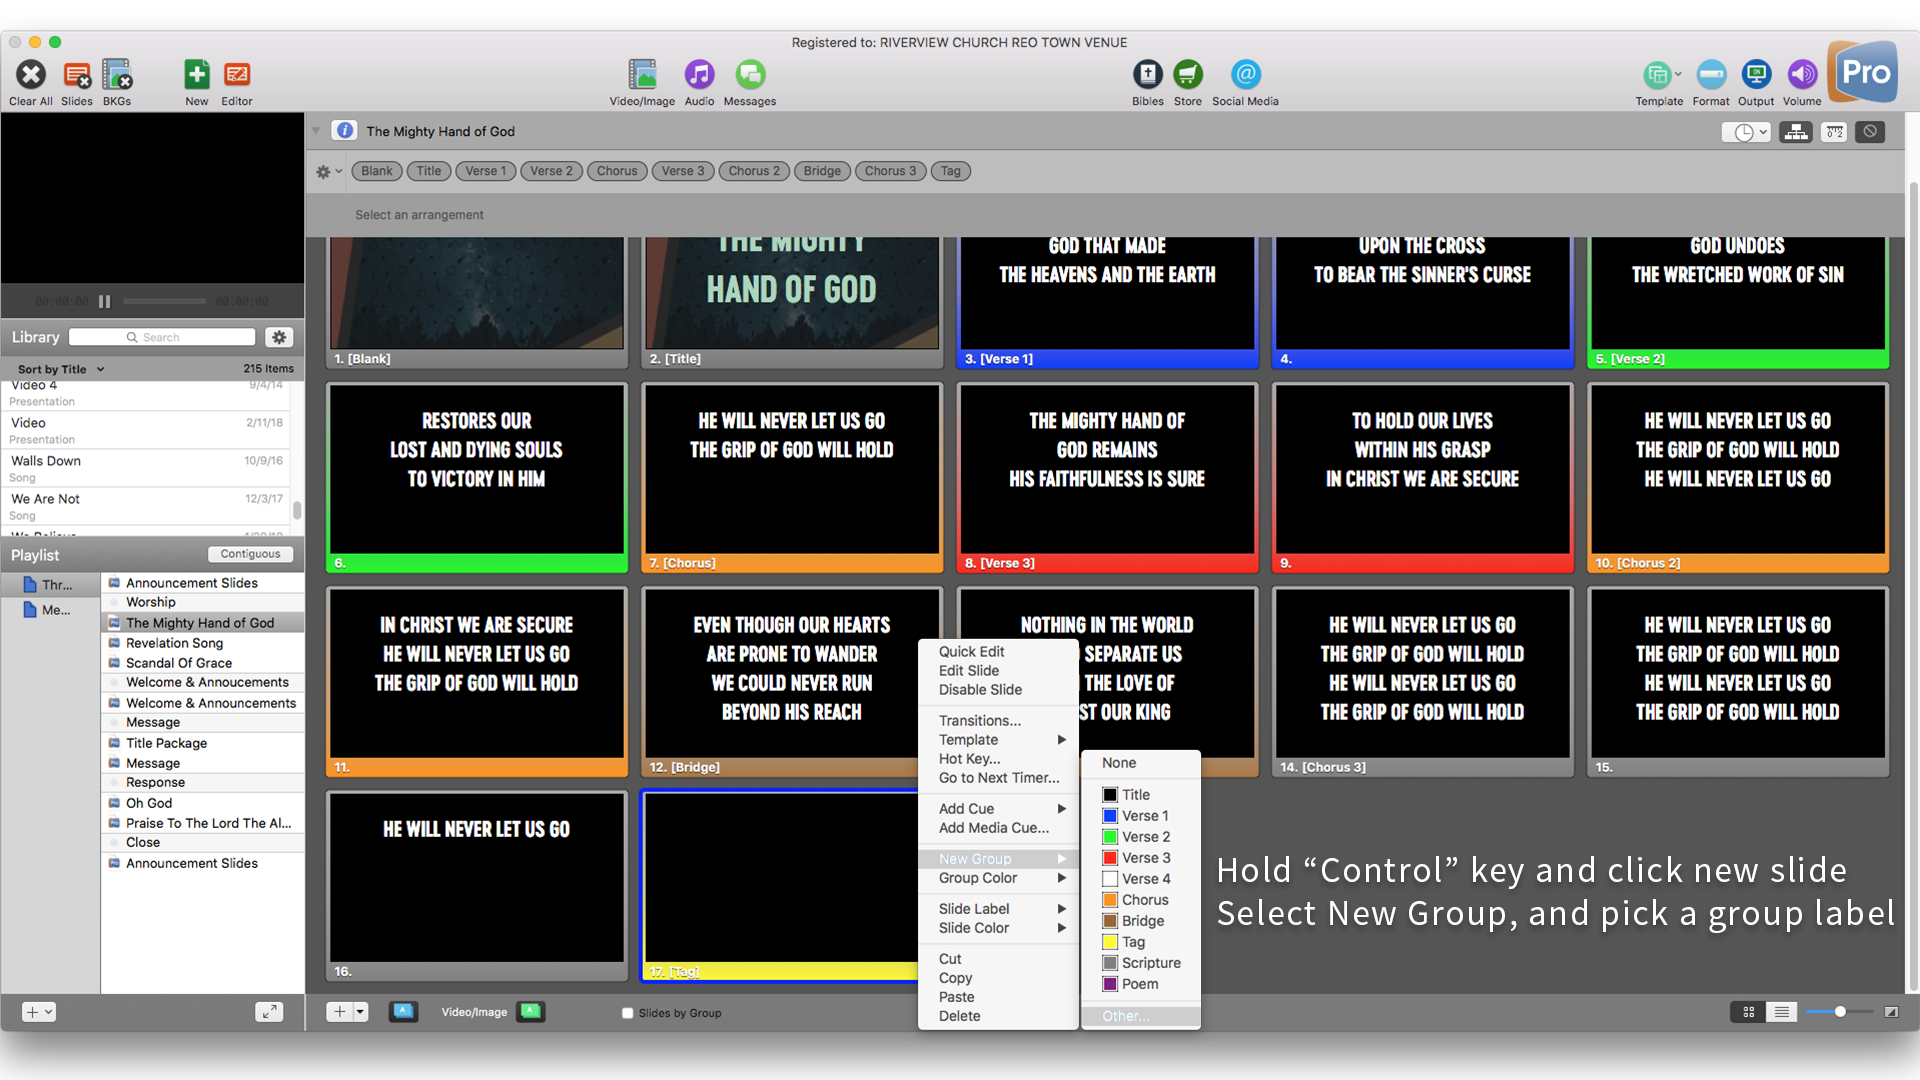
New slides are automatically added to the group of the slide you selected before pressing the “+” button in ProPresenter. To add a new group (section to the song), such as a tag, or alternate lyrics to a verse, hold down the “Control” key on the keyboard and click on the newly added slide. Select “New Group” and then a group label for this new song section. You can select from the list of default options, or use a custom label by selecting the “Other…” option. Please do not save new group label names to the default list.
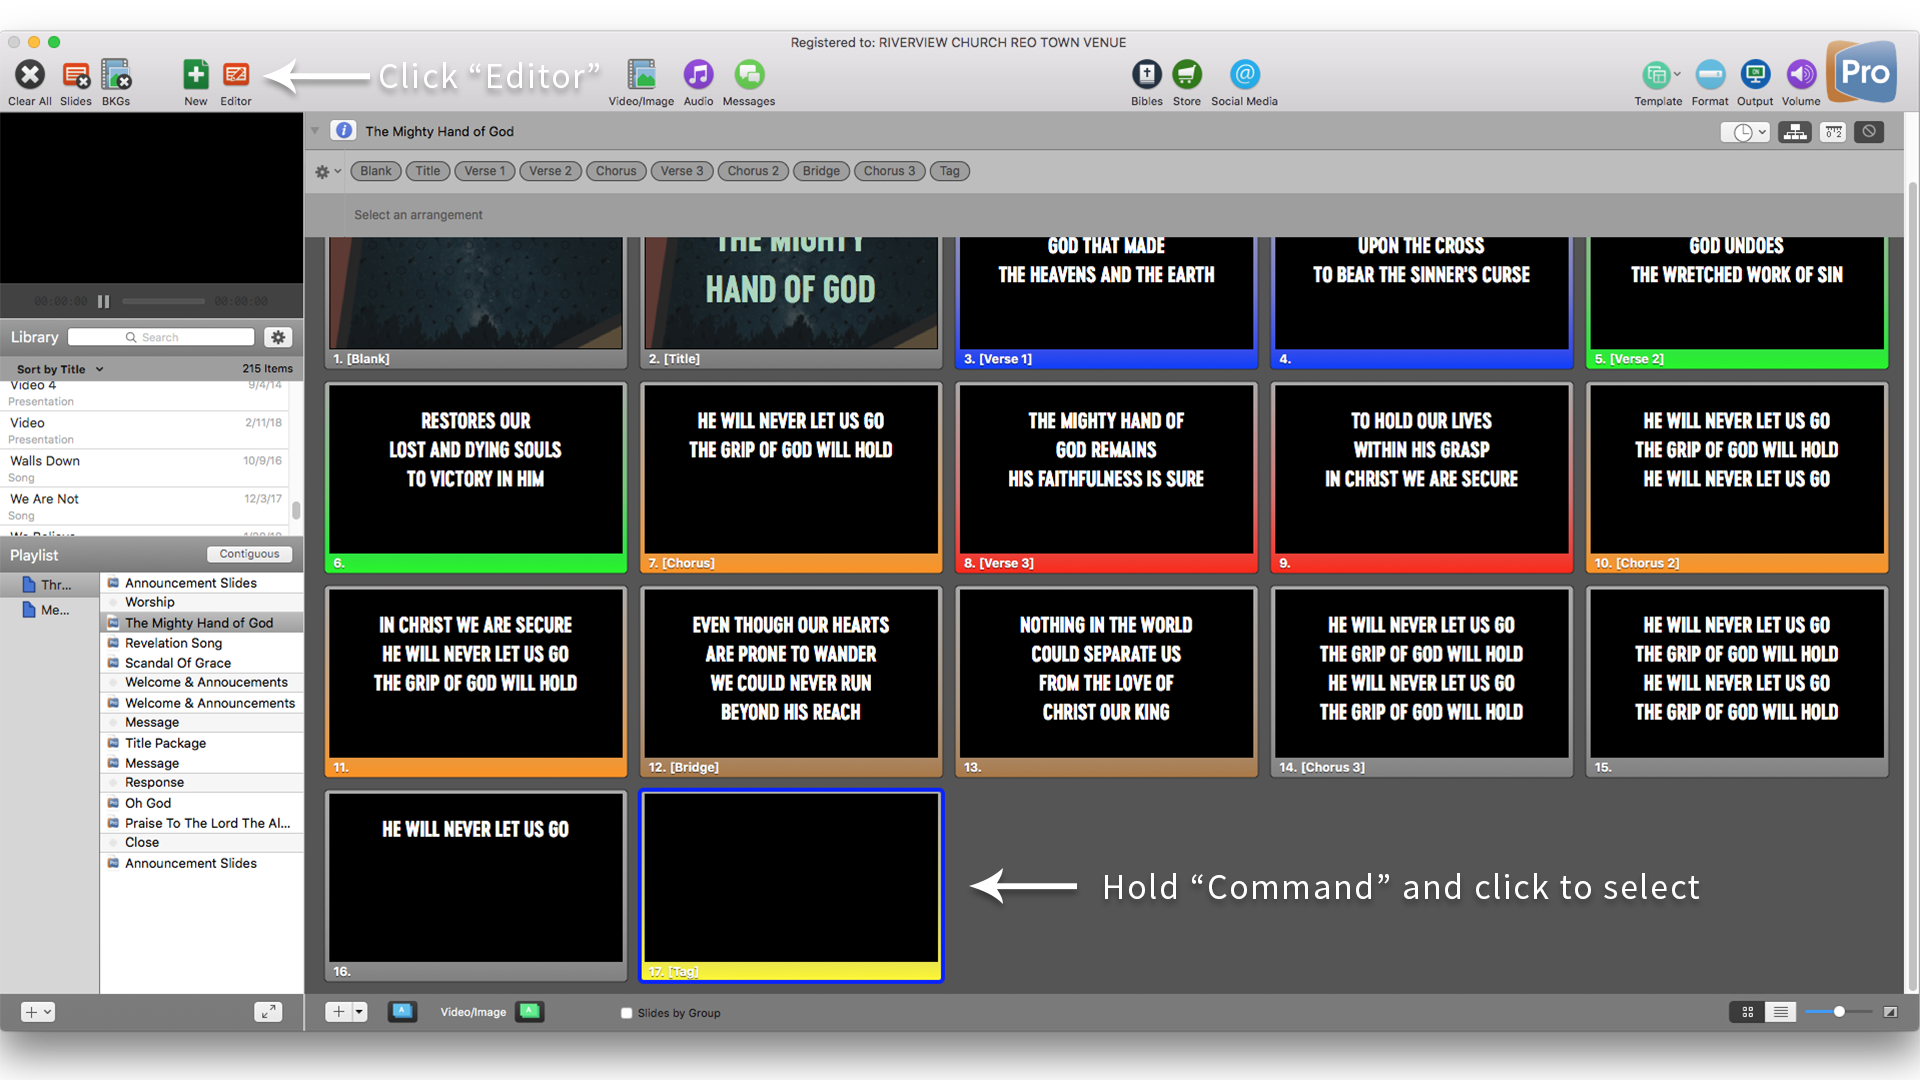
Once you have your new group created, you’ll need to add lyrics or text by opening the editor. Hold down the “Command” key on the keyboard and click on the slide to edit. Open the editor by clicking the “Editor” button toward the top left of the ProPresenter application toolbar.
With the editor open, double click on the top text box to enter new song lyrics or scripture verses. Double click on the bottom text box to enter new scripture references. Do not worry about formatting font style or size at this point. When you are finished making edits, close the editor window by clicking on the “x” at the top left corner of the editor window.

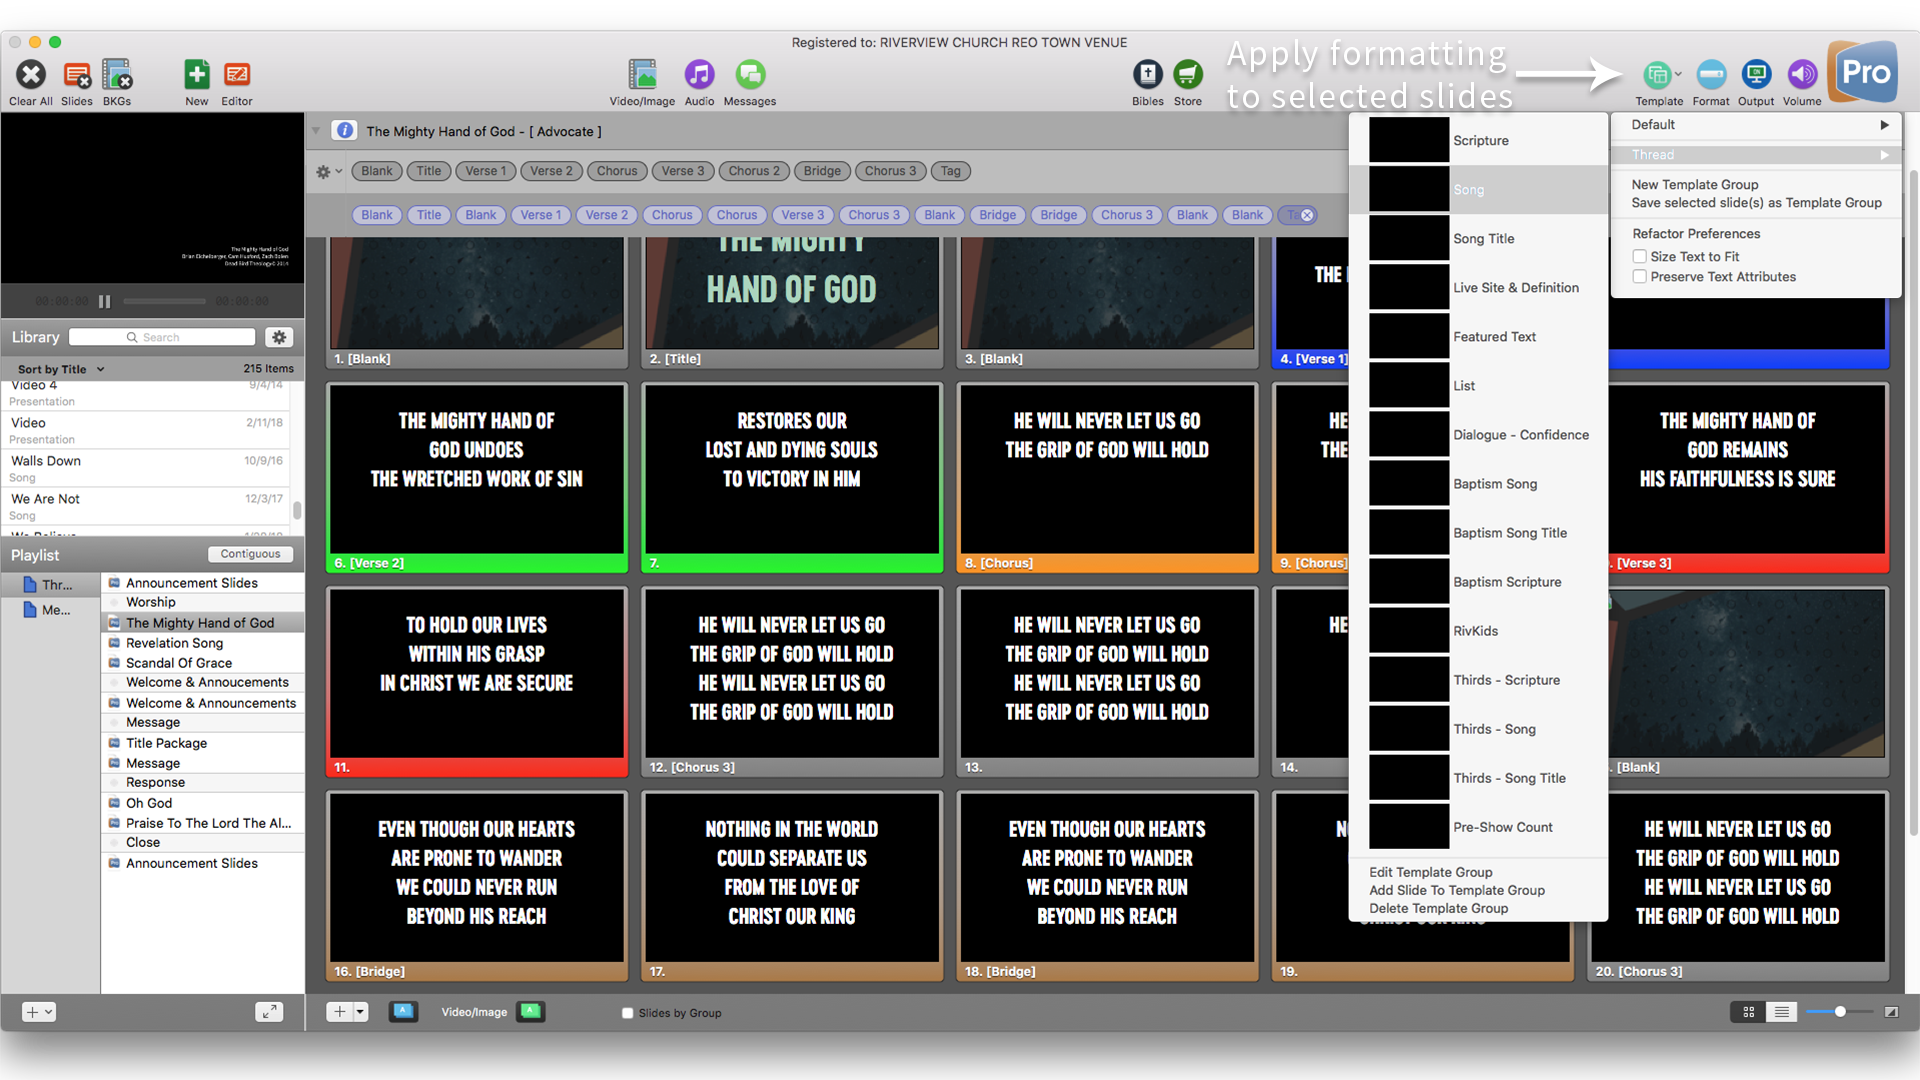
When you are finished adding new slides, the next step is to apply the correct formatting. Select the slides that need updated formatting by holding down the “Command” key on the keyboard and clicking on them. Open the formatting template menu by clicking on the “Template” button at the top right corner of the ProPresenter toolbar. Choose the current teaching series from the list, then select the formatting template for the type of slide to be updated.
After you have applied the correct formatting to your new slides, you can go back to the song arrangement for the band you are running presentation for by clicking on the gear in the top left corner of the arrangement toolbar and selecting the band name. Make adjustments to the arrangement by clicking and dragging the blue song section bubbles, or dragging one of the grey bubbles between the blue ones. Once you are done adjusting the band arrangement, close the arrangement toolbar by clicking the arrangement button at the top right screen (beneath the “Volume” button).