Waves has posted an article with some helpful tips about mixing drums. This was written to be used in studio work, but a lot of these tips are also helpful in a live setting. Take a look at steps 1 through 7 for some ideas on how to get a good drum mix.
Category Archives: Audio Team
12 Essential Steps to Mixing Lead Vocals
Waves has posted a helpful article about mixing vocals. While this is focused on vocal work in the studio, a lot of these tips are helpful and can be applied in a live setting as well. Take a look at steps 3 through 8 for some good ideas on a vocal channel processing chain.
Multiband Compression Tips
Waves has posted a great article about Multiband Compression. Between Waves C4 and C6 products at our Holt and Westside venues, and the Pro Multiband Compressor at REO Town, we have some great tools in place to help achieve controlled dynamics and well shaped tone in one stop. Take a look this article and the videos included within it to find out how.
5 Compression Mistakes Mixers Make
Waves posted a nice article on their blog about using compression in your mix and some of the common things to look out for. There are also a few videos embedded in the article explaining some of the pieces further. Check it out sometime when you get a chance.
The Importance of Mic Placement for Guitar Amps
Lynn Fuston wrote a great post on Sweetwater’s site about the importance of mic placement for guitar amps. It includes some recorded examples so you can hear how a 1″ change in placement can have a big effect on tone. This is another great example of how it’s easier to get desired results by changing something on stage before you reach for those EQ knobs. Check it out!
4 Tips for Mixing Live with Reverb
Ken “Pooch” Van Druten shares some great tips on the Waves blog about getting the right reverb sound no matter what space you’re working with. If you’re looking to dial in reverb to liven up your mix, check out this article.
How to Mic a Snare Drum
Lynn Fuston posted a great article on Sweetwater’s site about mic’ing snare drums. If you’re looking for a different sound out of your snare, try a different mic position instead of relying on EQ to get a specific tone.
As a quick side note, remember that mic placement matters! This is especially true for drums and guitar amps as a small move of the mic can make a big difference in your sound.
The Ultimate EQ Cheat Sheet for Every Common Instrument
Aaron Staniulis posted this very helpful article over at the Sonicbids blog. If you’re reaching for an EQ knob but not entirely sure where to start at, take a look at this for a good jump off point.
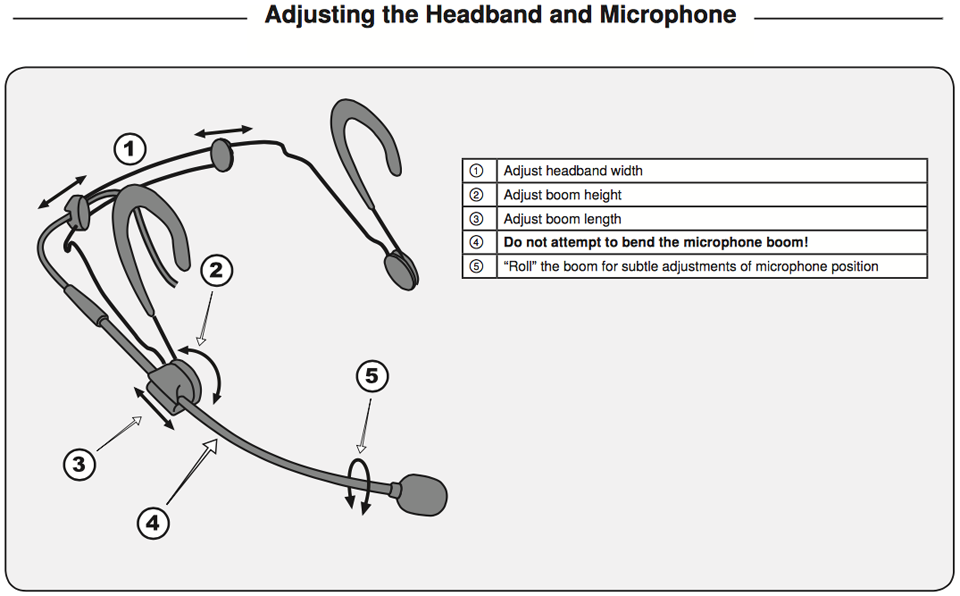
Headset Microphone Placement Guide
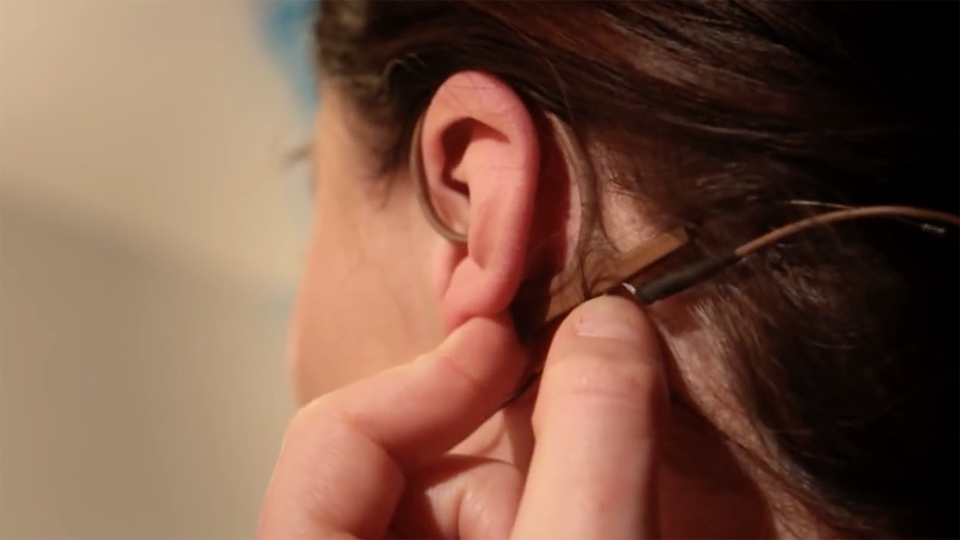
Here is a simple guide to help with placement of headset microphones. Microphone placement for speaking is very important as a small change in placement can make a big difference in the tone of someone’s voice. Spending a few seconds to check and double check proper placement will help achieve the most natural sound, which in turn eases the ability for people to focus in on what is being taught.
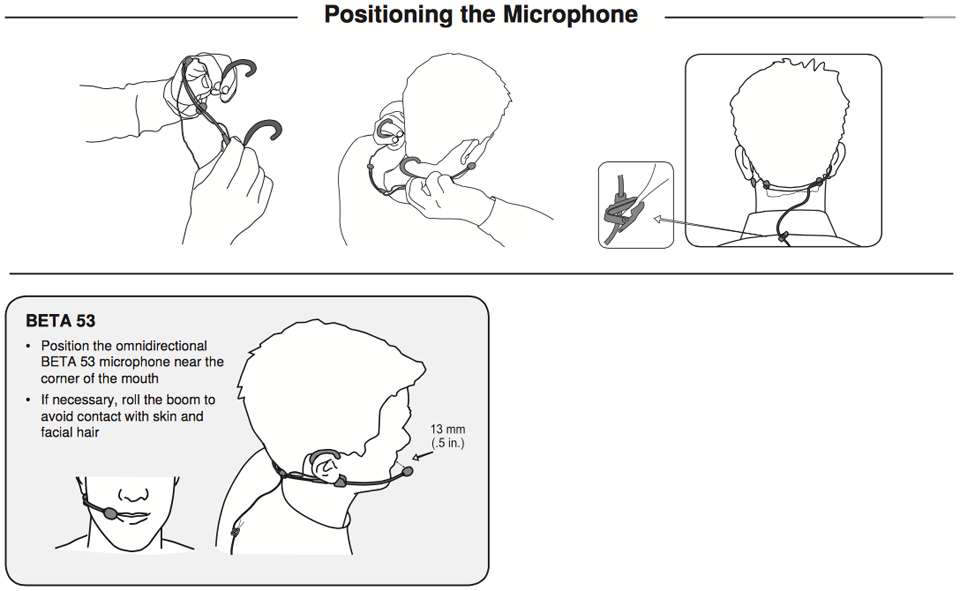
The boom should be adjusted to rest as close to the face as possible with the microphone capsule about an inch behind the corner of the mouth. Rotate or bend the microphone boom (depending on model) to achieve optimal positioning. Leave a little room for facial hair as necessary.
Here is an example of what proper microphone placement should look like. A few seconds to make these adjustments will help achieve the best sound quality and make the headsets comfortable to wear.

Below is a guide of adjustments for the different style of headset microphones at Riv.
The Shure Beta53 headset’s adjustments are as follows.
The DPA 4088 headset adjustments include adjusting the headband width, adjusting the boom length, and bending the boom position. Be sure to always bend the boom over a gentle surface, like a finger. The boom can be bent for both horizontal and vertical optimal positioning.
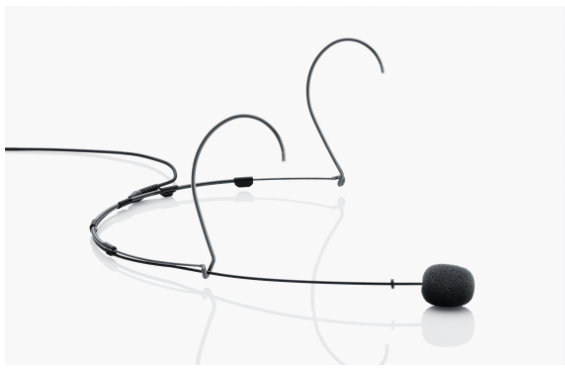
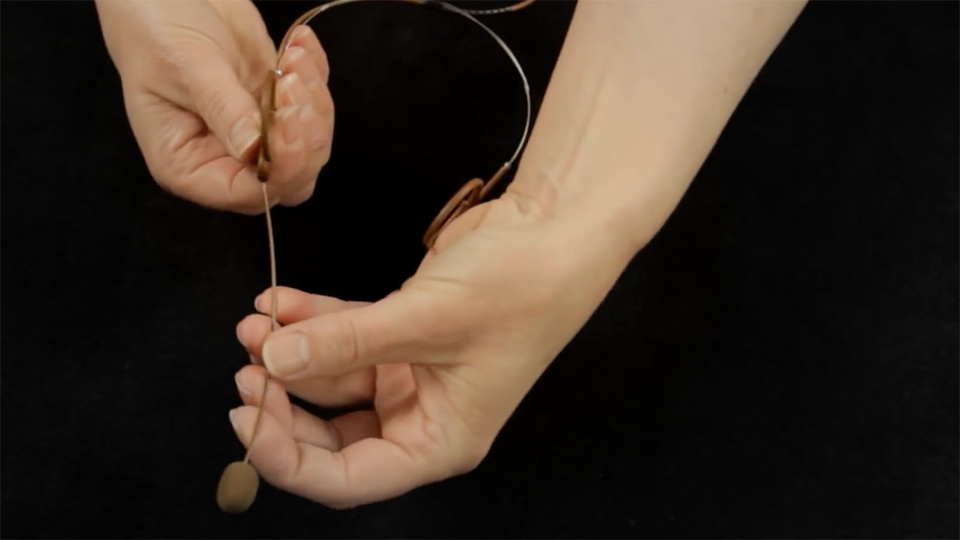
The DPA FIOF10 headset adjustments include the headband width, the boom length, and boom roll. The ear loops should be placed with the flat section fully under AND behind the earlobe.
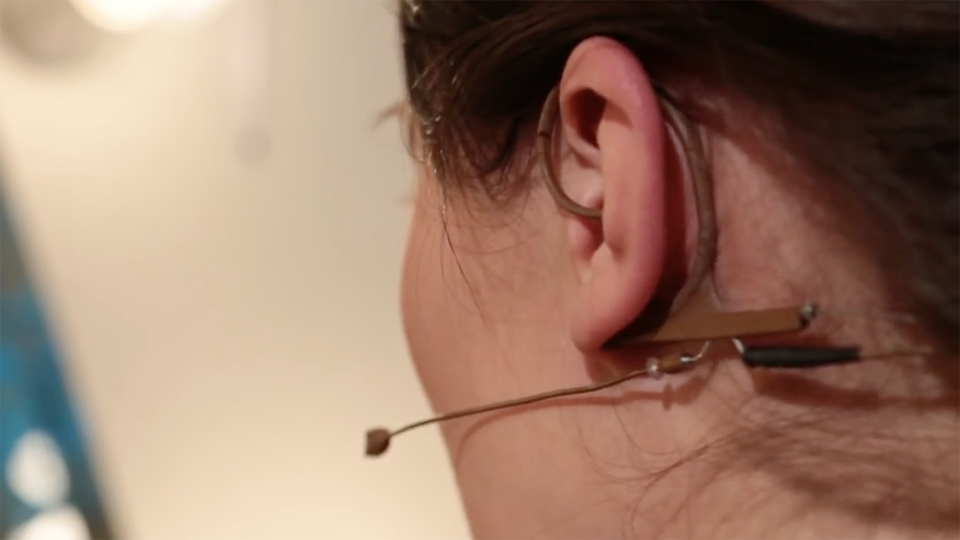
The boom can be adjusted in length by sliding forward or backwards inside the flat section.
To reverse which side the boom is on, simply rotate both ear loops.
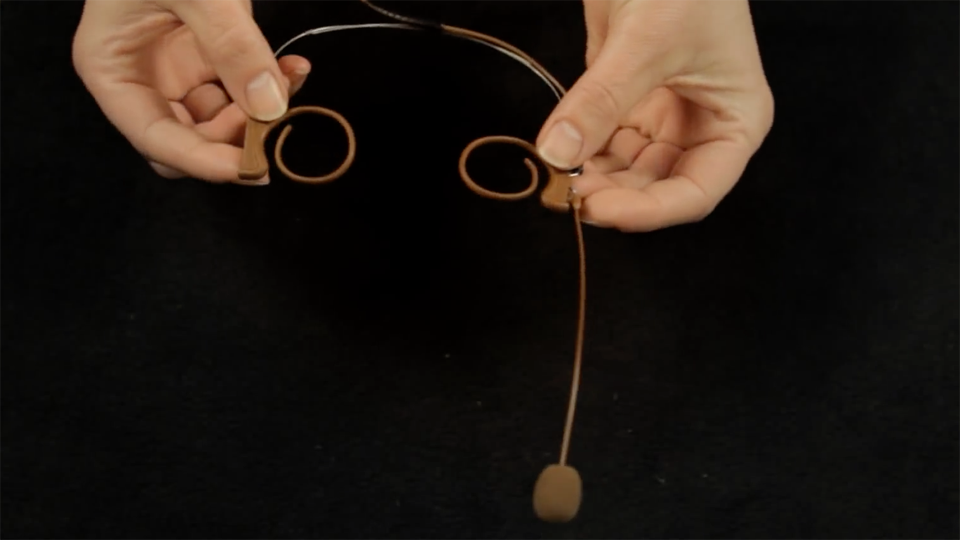
Then roll the boom to the correct position.
Setting up a basic mix
To help establish some best practices, I thought I’d share these few steps to getting at least half way to a good sounding mix.
1. Start with your inputs. Make sure everything is plugged in correctly. Identify devices that need phantom power. Check good, close microphone placement for instruments and vocals. Remember that good input = good output. You can not fix a bad sounding input, or poorly placed microphone from behind the FOH desk. Make sure to check your monitors and ears are plugged in correctly too.
2. Check your patching and assignments. Before everything else, confirm that your inputs are patched to the correct channels, outputs are patched to the correct aux’s, and any VCA or group assignments are correct. Getting this step out of the way first ensures that you can spend time crafting your mix, not stumbling over why levels aren’t balanced, or musicians can’t hear properly.
3. Gain structure, gain structure, gain structure! I can’t tell you how many times I’ve heard problems with a mix that could be easily fixed with proper gain structure. Before setting your monitor or main mixes, make sure to get the gain structure correct. This means checking and double checking your preamp levels, matching instrument/vocal gains, and being consistent across the board. Aim for -3dBu levels on everything to start. Set all the input faders at 0dB and bring up the master to 0dB. Match the levels of your subgroups or VCA’s. You should have a good balance of everything. If you don’t, adjust the preamps of each input until they balance. Be sure to check gain before and during rehearsal. Sometimes things change after a song or 2. Make corrections as necessary.
4. Set your monitor mixes. Spend time talking with the musicians to make sure they have a good mix so they know what they need to play. Great sound comes from great performances. Do whatever you can to help the musicians play their best. Remember, a great monitor mix doesn’t need to include everything. The less instruments you put in a mix, the more level you can give of those few instruments. Make sure to leave the house on while setting monitor levels. Musicians will hear some of the house mix, which decreases the need of monitor level.
5. Set your house mix. Balance levels between instruments. Know who leads what songs, and make that the loudest vocal / instrument. Don’t be afraid to make changes. Use EQ, gating, and compression to help improve the sound of each input, and how those inputs interact with each other. Be sure to start from the bottom up. Set your drums, bass, and rhythm instruments first. Add lead instruments like guitars and keyboards. Finish with vocals so they stay on top of everything else.
Following these 5 steps will get you up and running with a decent mix. Additional time spent on EQ, compression, and effects can round everything out nicely. Don’t forget however to establish these 5 things first.